Matching Engines
Matching engine introduction
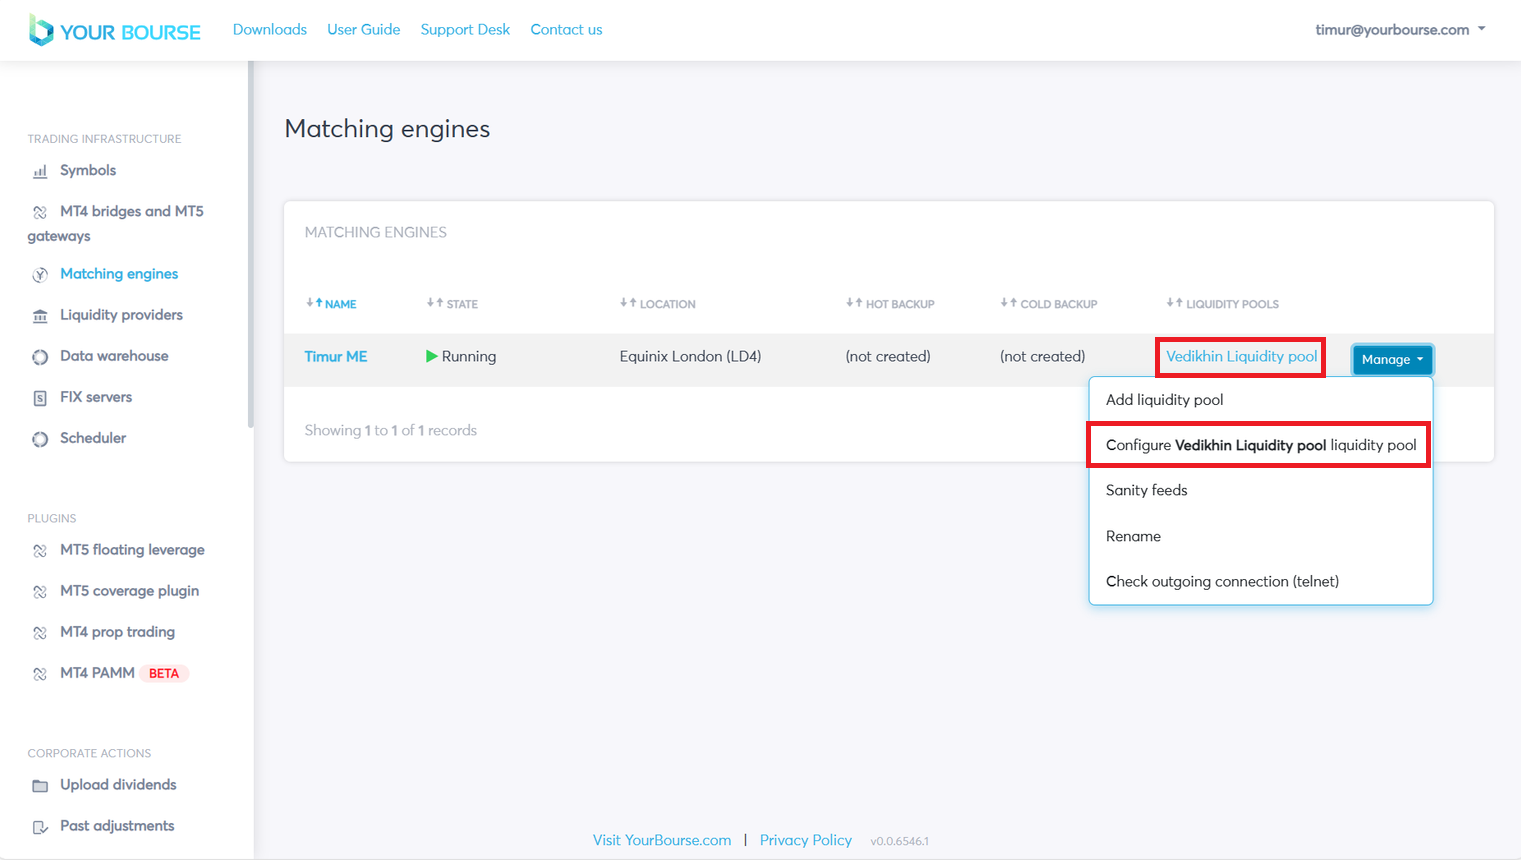
The Matching engine feature can be accessed by selecting the “Matching Engines” tab on the left side of the page.
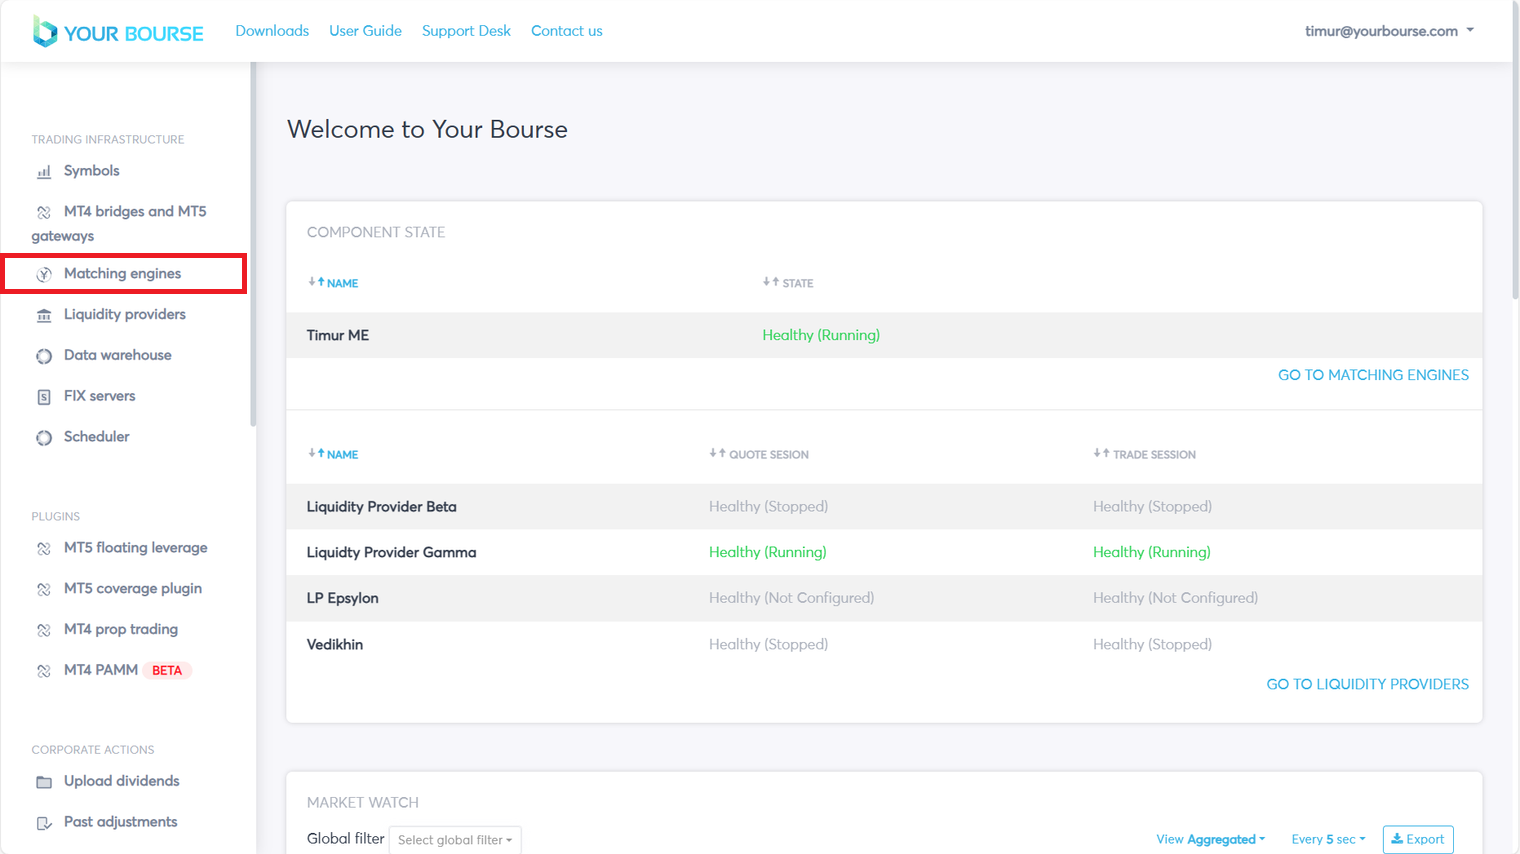
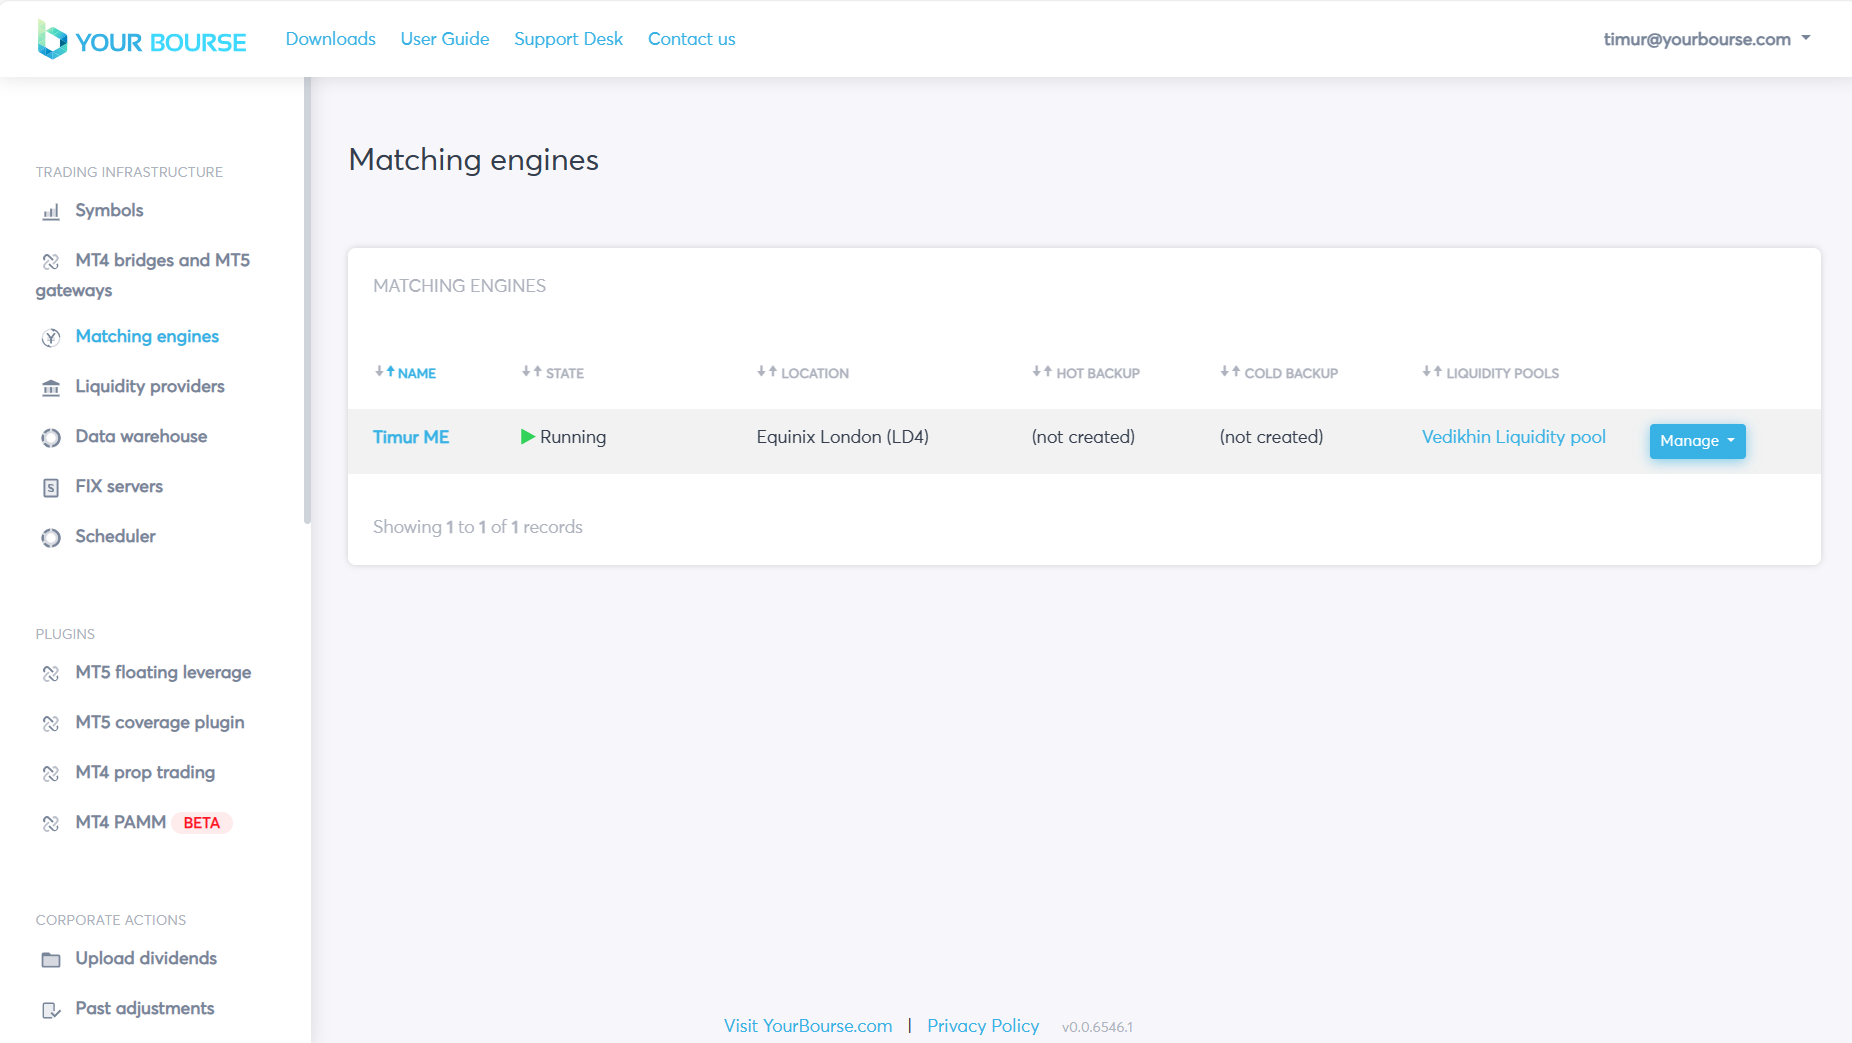
After selecting the tab a table of configured matching engines is shown. There are several parameters displayed in the table including:
-
Name - the name of the matching engine
-
State - status of the matching engine
-
Location - data centre where the matching engine components are located
-
Hot backup - hot backup configuration
-
Cold backup - cold backup configuration
-
Liquidity Pools - the liquidity pools assigned to the specific matching engine
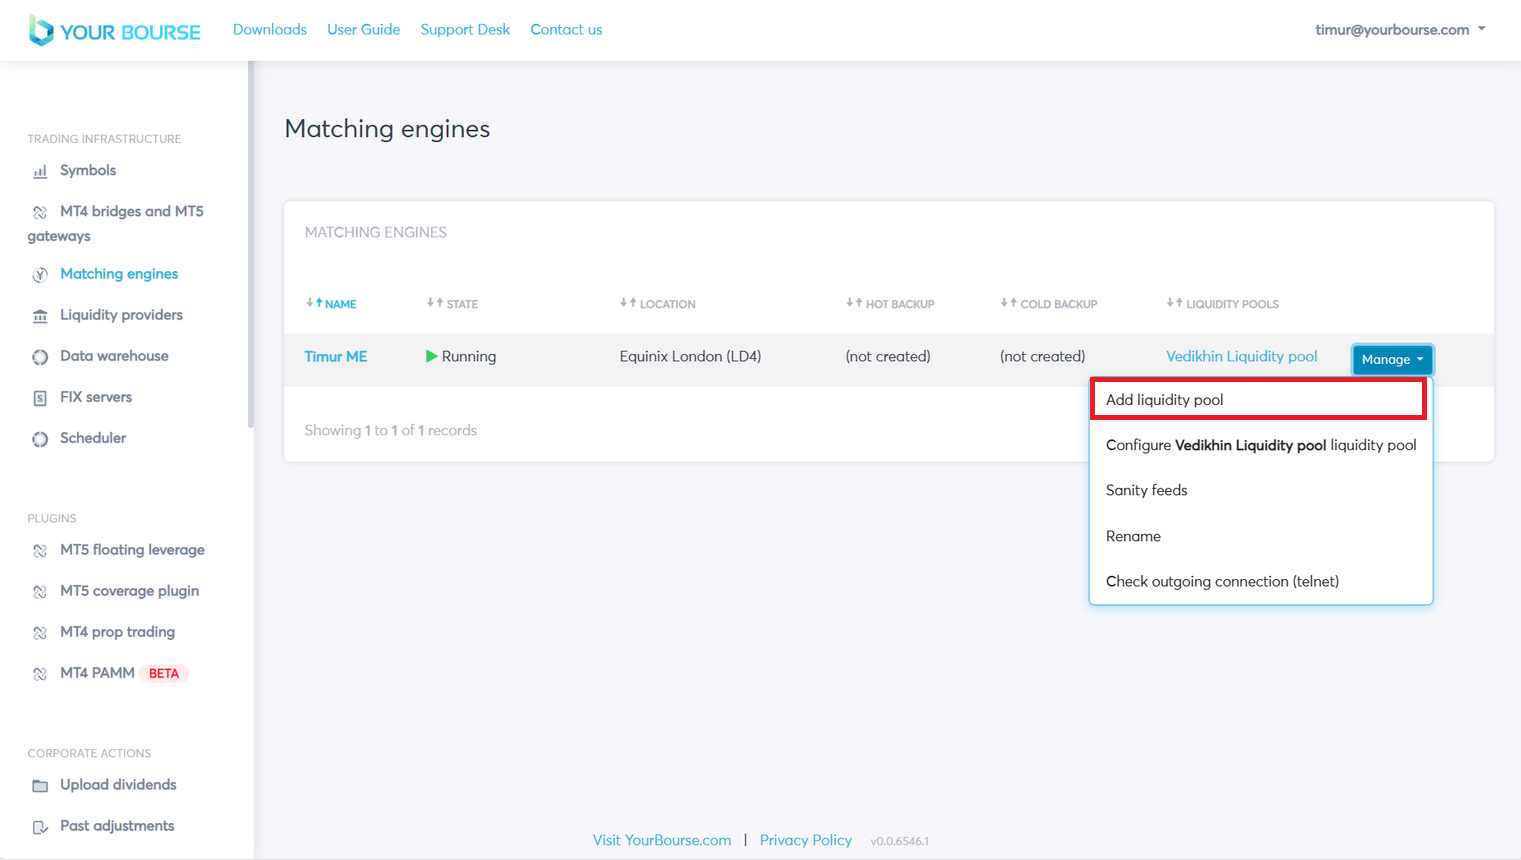
By clicking the “Manage” button a drop down menu is opened with several configuration options.
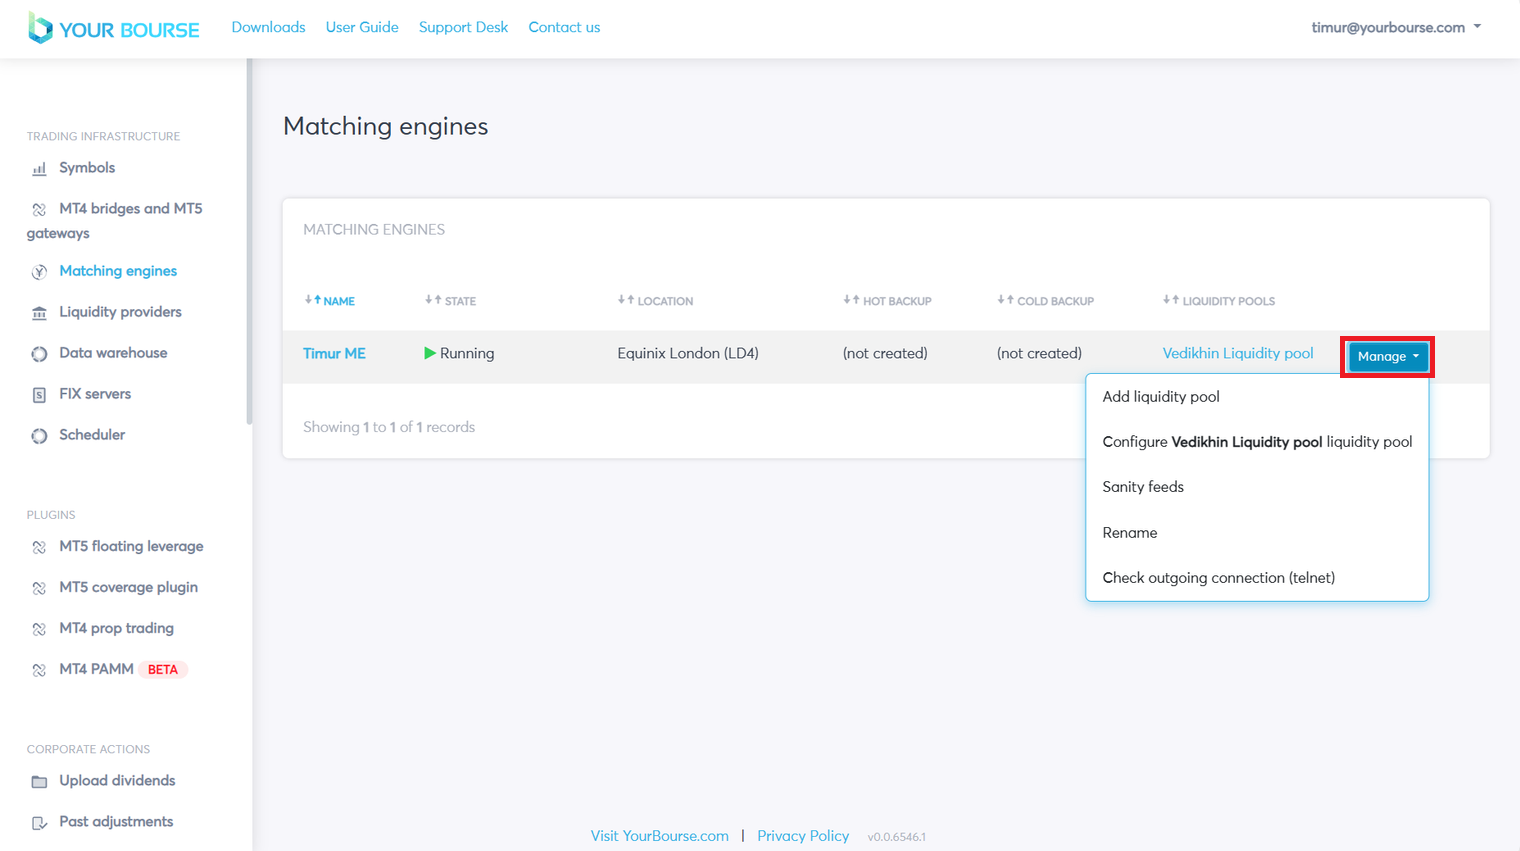
Let’s consider all the options:
Add liquidity pool - creates a new liquidity pool for this matching engine. The number of possible liquidity pools that can be created is limited
Configure 'X' liquidity pool - check and configure the already created liquidity pool
Sanity feed - risk management feature that compares the liquidity from different liquidity providers and filters out the spikes in liquidity
Rename - rename the matching engine
Check outgoing connection (telnet) - separate the networking feature that relies on telnet protocol to make sure that the connection exists between matching engine and other components in the network
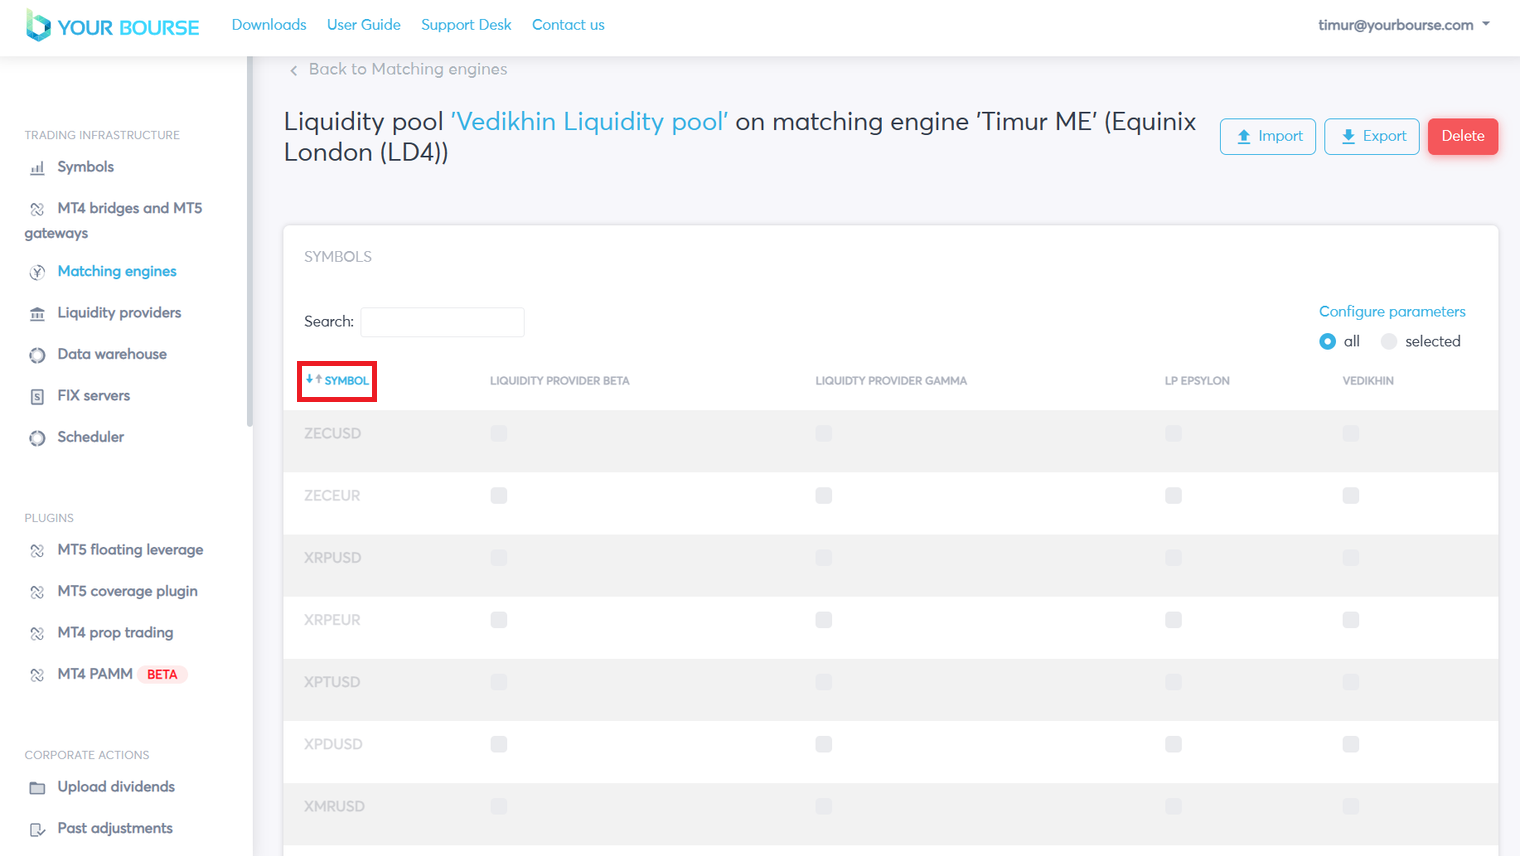
Liquidity Pool Configuration
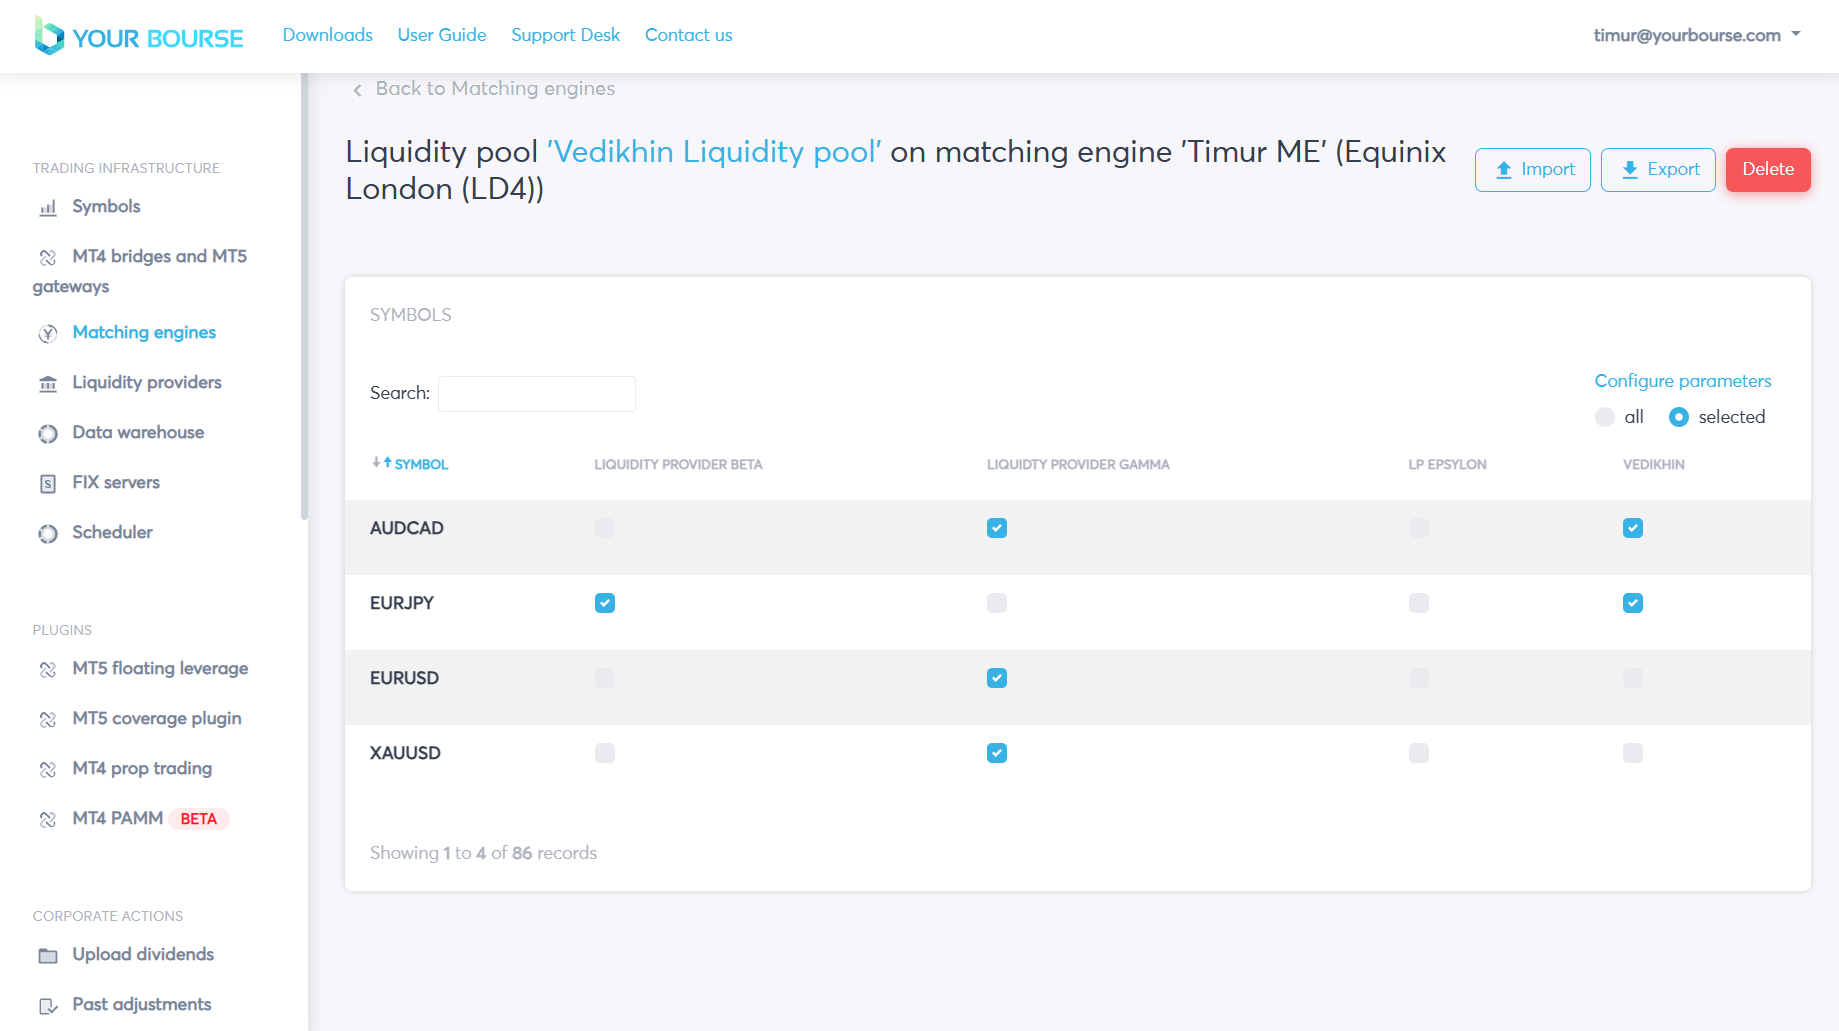
A liquidity pool is a specified collection of different symbols from the corresponding liquidity providers. The YourBourse platform allows the user to configure multiple different liquidity pools and create very different constellations of the symbols and their respective sources.
There are two ways to access the liquidity pool configuration. The first involves selecting the “Manage” button and then selecting the “Configure “LIQUIDITY POOL NAME” liquidity pool” button, the second involves clicking on the liquidity pool name (seen in blue) under the “Liquidity Pools” column.
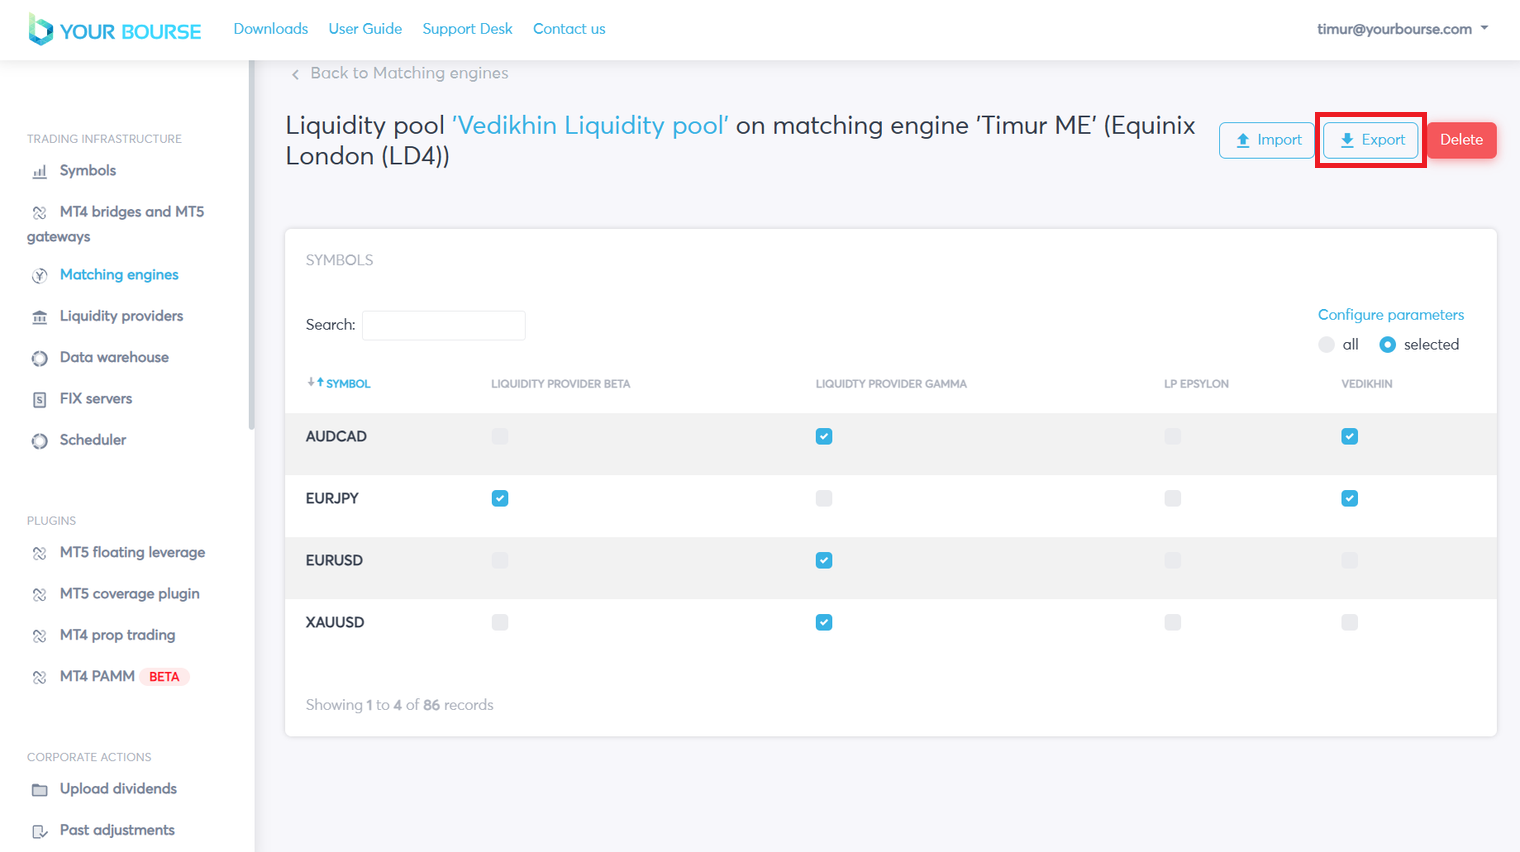
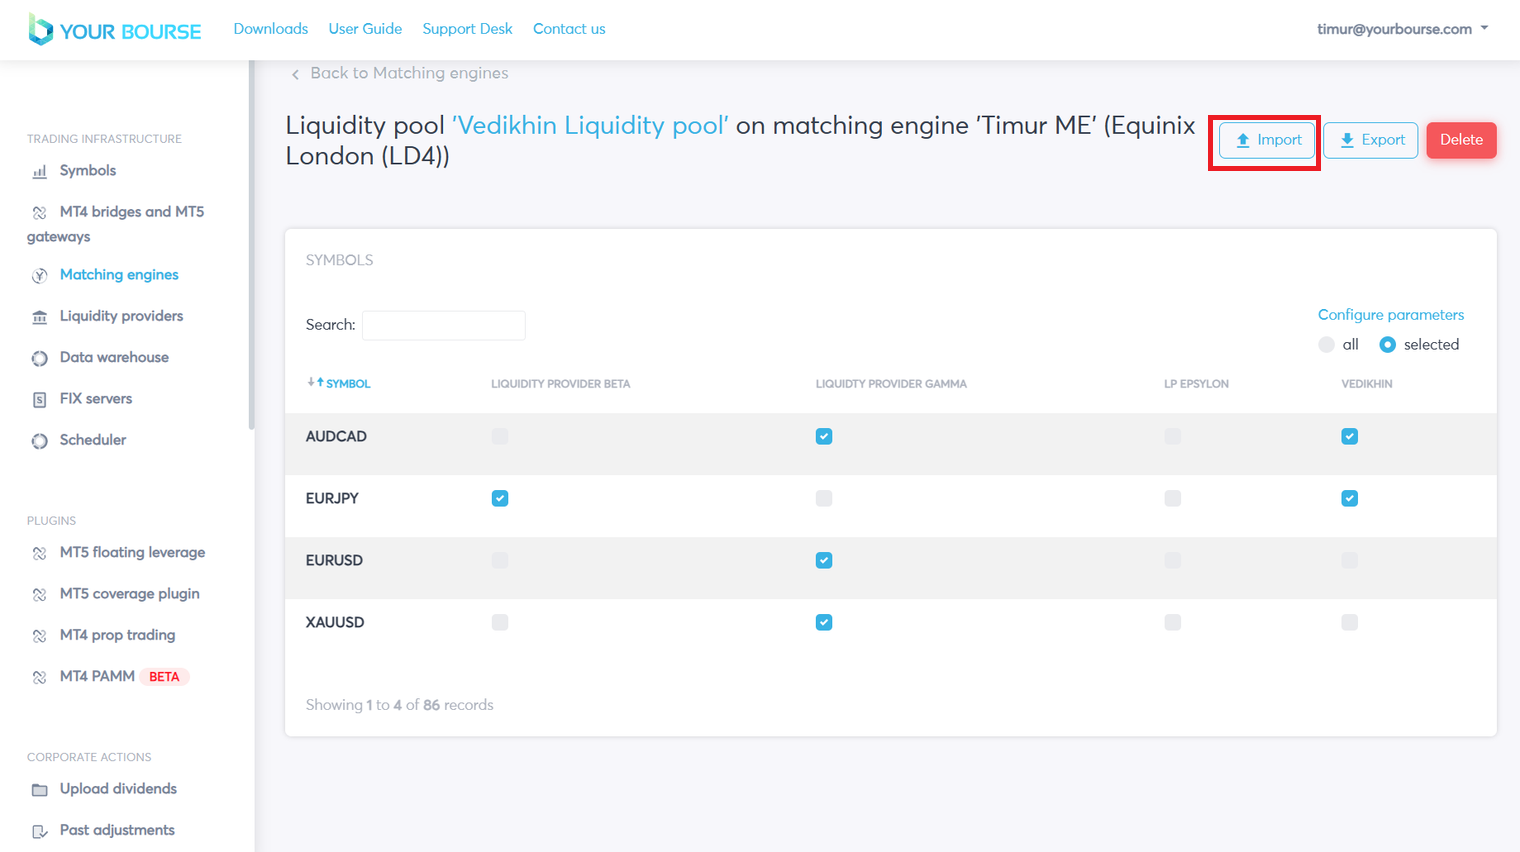
A page is opened containing a table with a list of all available symbols in the chosen liquidity pool.
The table contains multiple columns with each column representing a liquidity provider that is part of the liquidity pool e.g. the “Vedikhin Liquidity pool” is made up of four liquidity providers “Liquidity Provider Beta”, “Liquidity Provider Gamma”, “LP Epsylon” and “Vedikhin”.
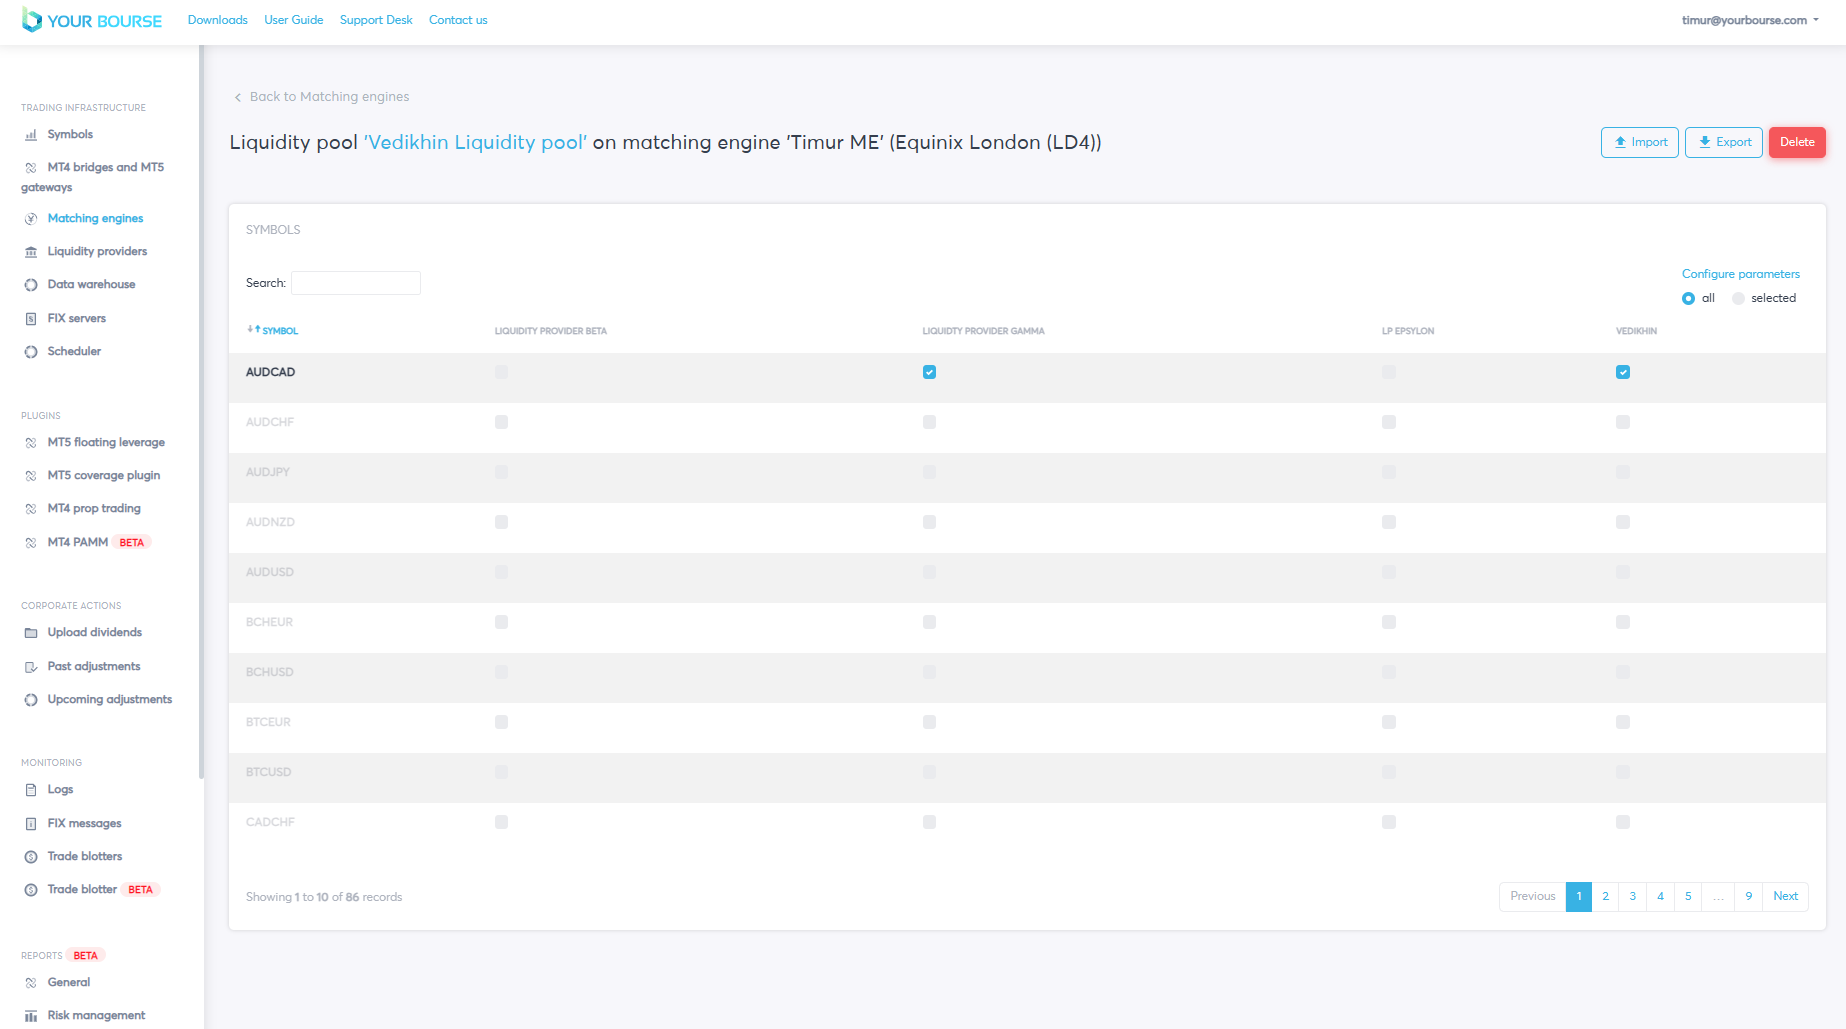
For each individual symbol the user can select which liquidity providers are chosen for pricing, this is achieved by clicking the square to either select or deselect a liquidity provider.
A grey square means the liquidity provider is deselected and a blue square with a white tick shows that the liquidity provider has been selected.
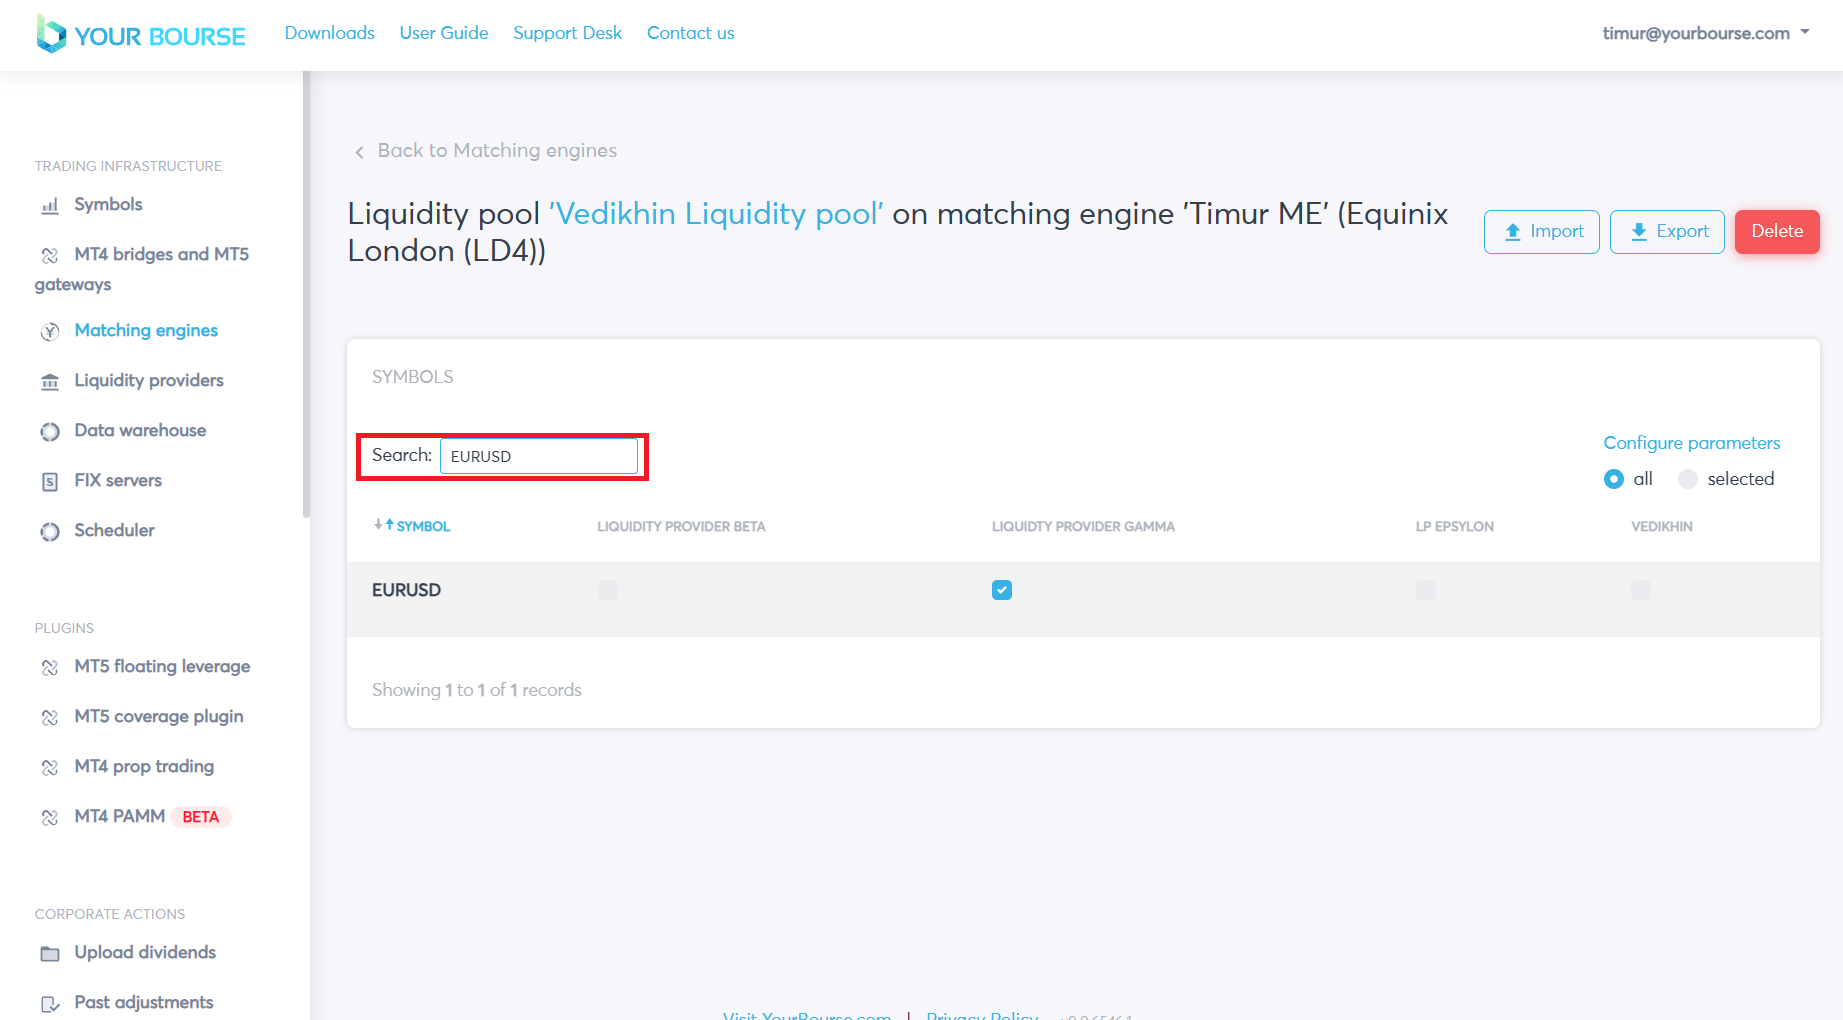
E.g. “Liquidity Provider Gamma” and “Vedikhin” are selected for AUDCAD, “Liquidity Provider Beta” and “LP Epsylon” are deselected.
Main Table Display Customization
The YourBourse platform allows the user to customize the display of the main table, the main table currently displays all symbols provided by the liquidity pool however by selecting the “selected” icon only symbols that currently have pricing from certain liquidity providers are displayed (not every possible symbol is now displayed).
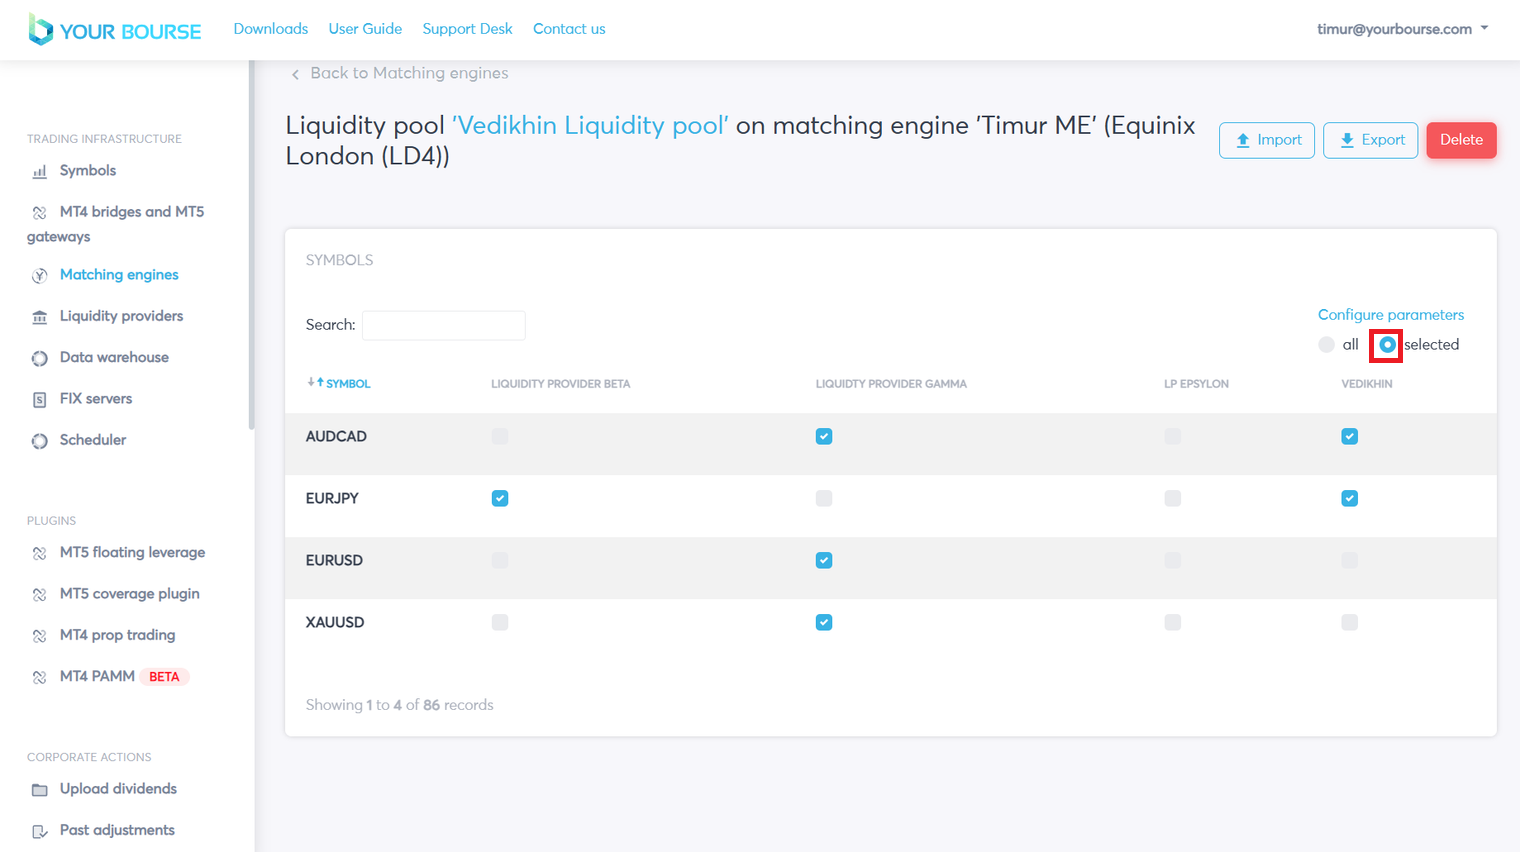
To reverse this and display every possible symbol the user should select the “all” icon.
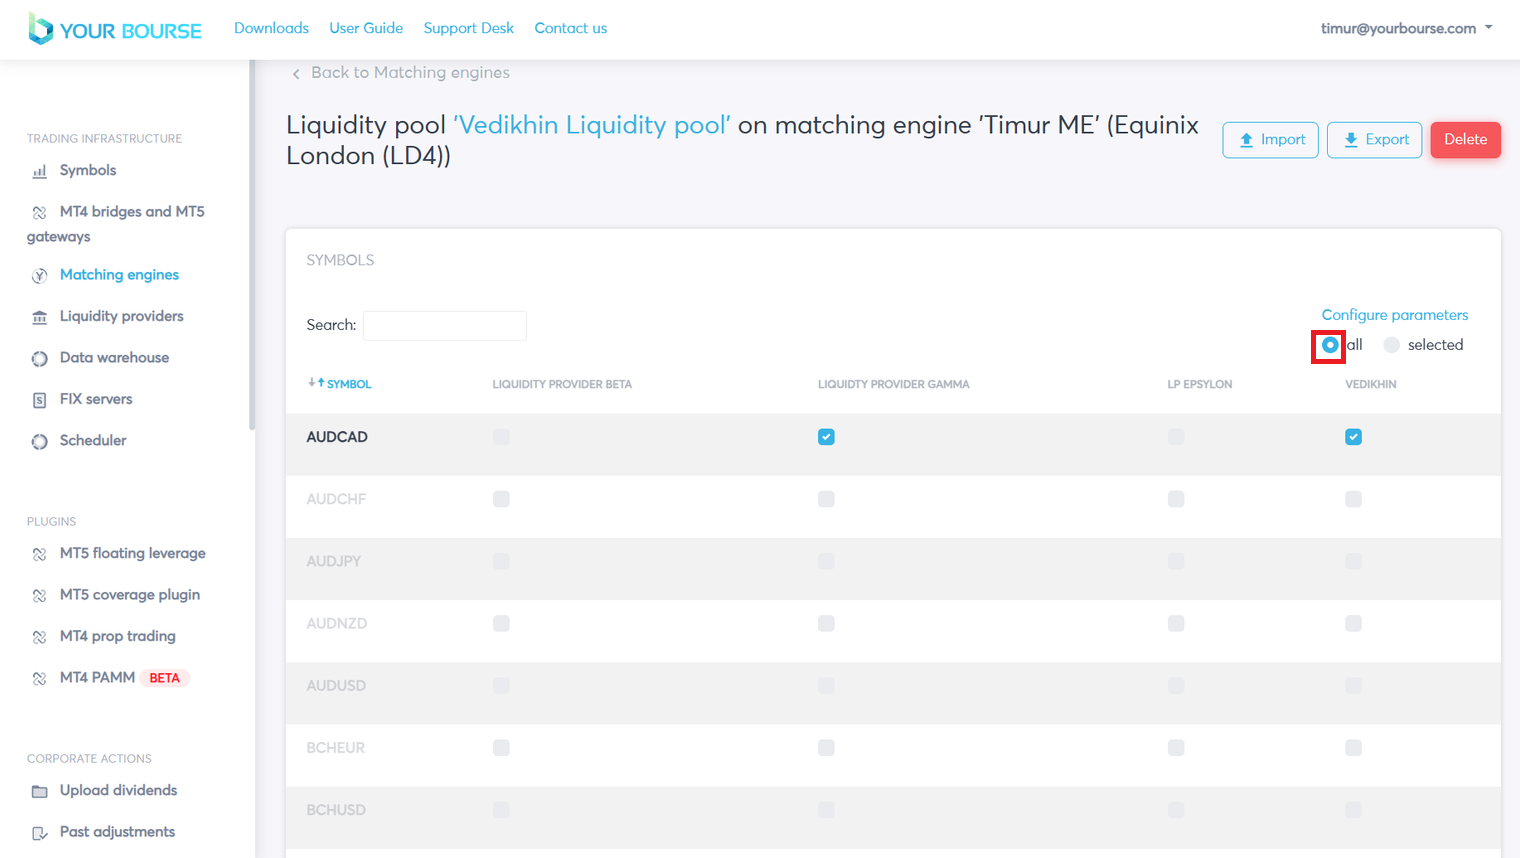
The symbols are listed in alphabetical order by default however by selecting the blue “Symbol” icon the table can arrange them in reverse alphabetical order.
Similarly the user can search for a specific symbol name by clicking the “Search” bar and inputting the symbol name.
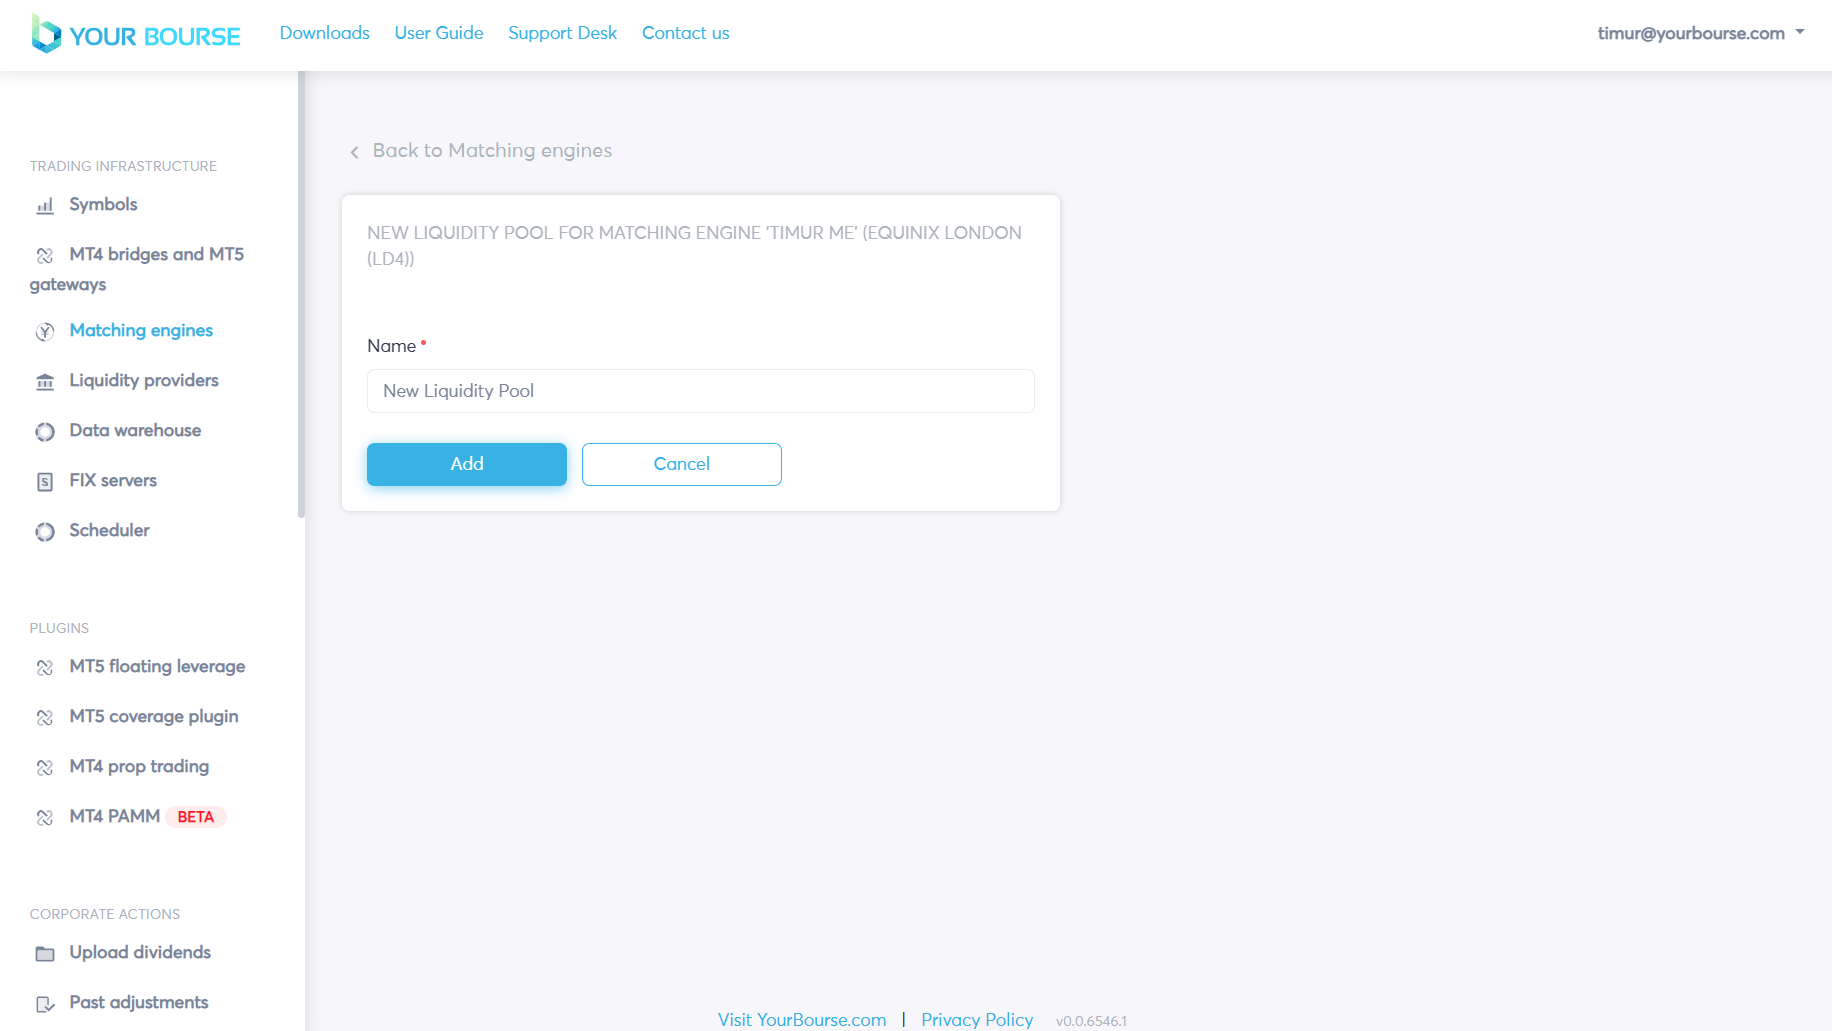
Adding a Liquidity Pool
Multiple Liquidity Pools can be added for a single Matching Engine, this is achieved by selecting the “Manage” button followed by the “Add Liquidity Pool” button.
A new page is opened where the user can input the name of an existing liquidity pool that they want to add.
The “Add” button will submit this request and the “Cancel” button will return the user back to the “Matching Engines” page without adding this liquidity pool.
Customizing Liquidity Pool Parameters
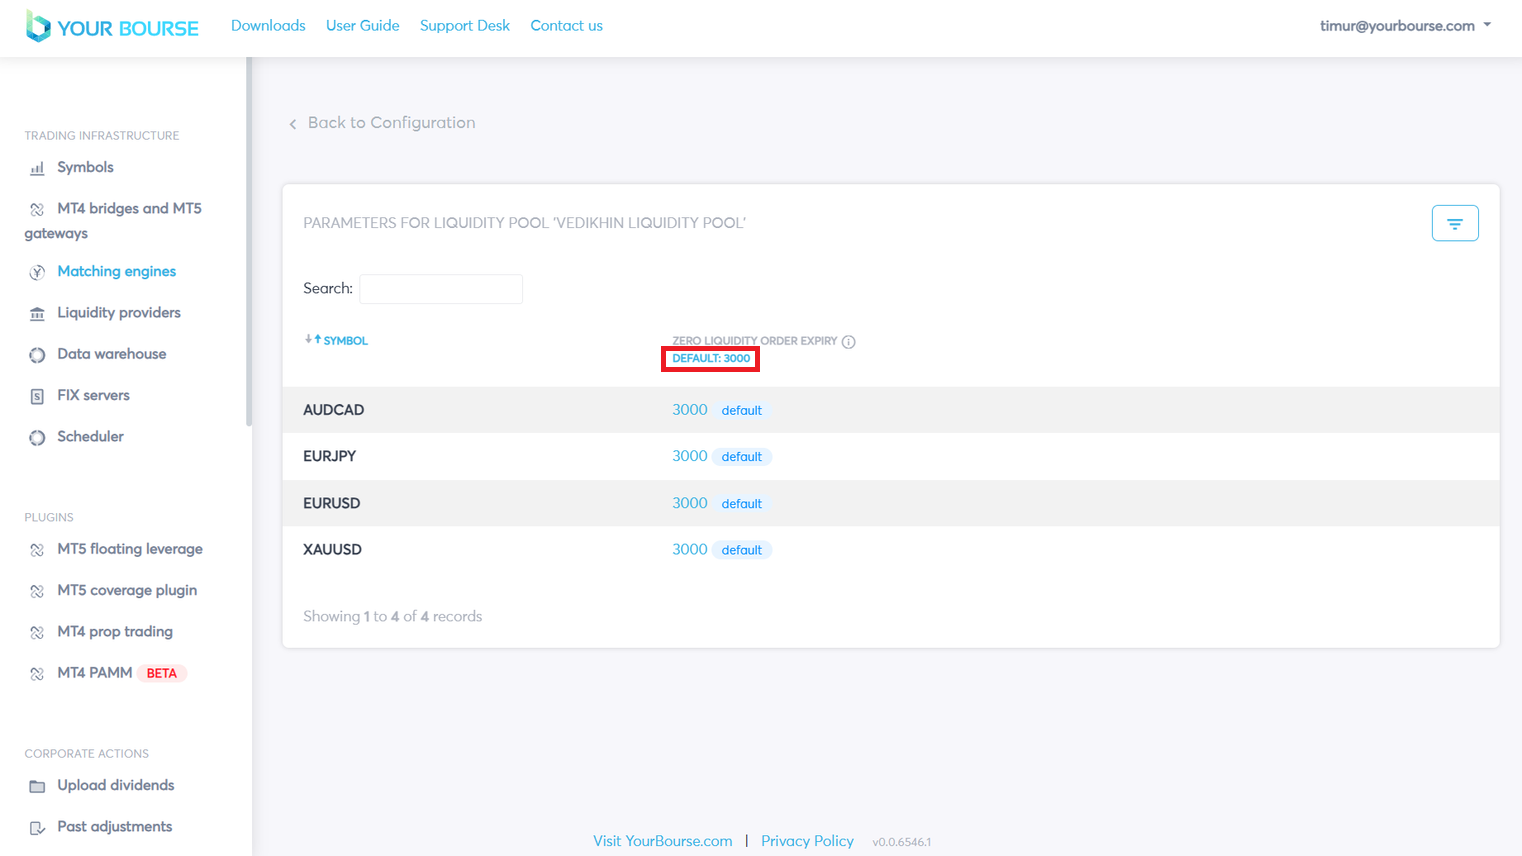
The user can customize specific parameters for configured symbols, by selecting the “Configure parameters” button a new page is opened.
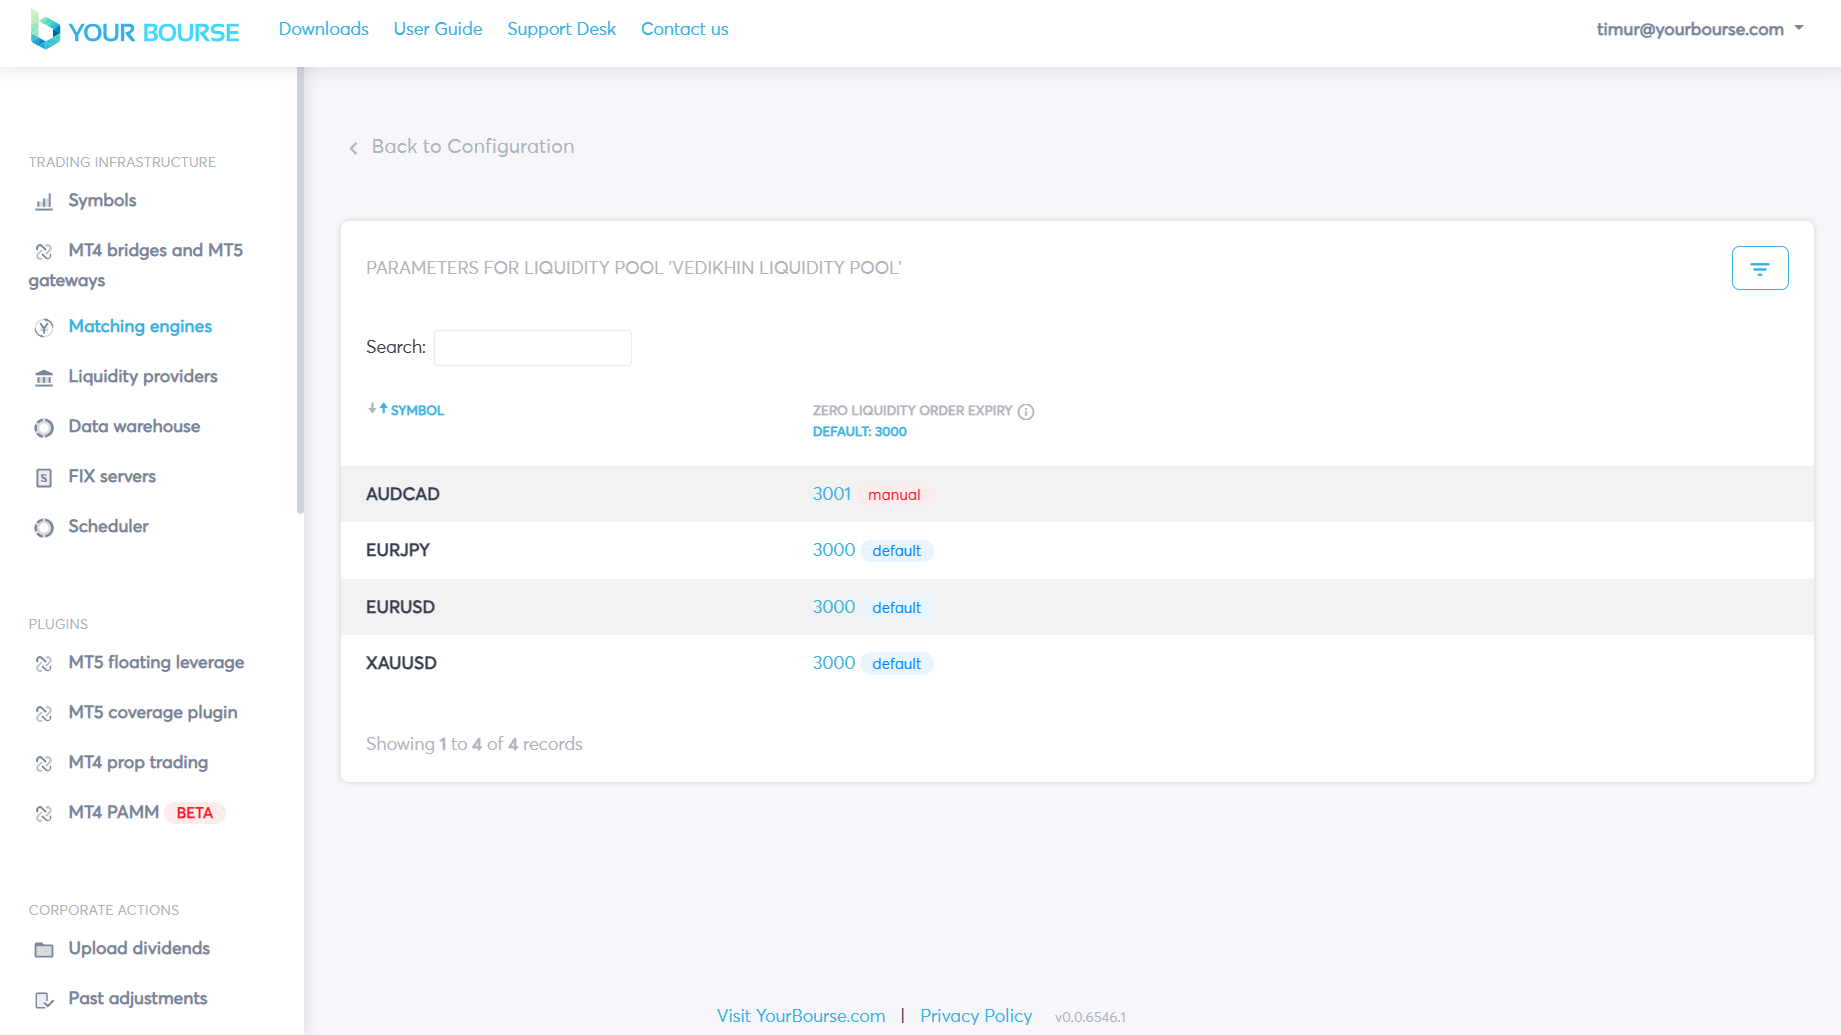
The new page has a list of all the configured parameters. The “Zero Liquidity Order Expiry” parameter is the number of milliseconds fully filled orders will stay in the order book for.

This parameter can be customized for all symbols or a specific symbol.
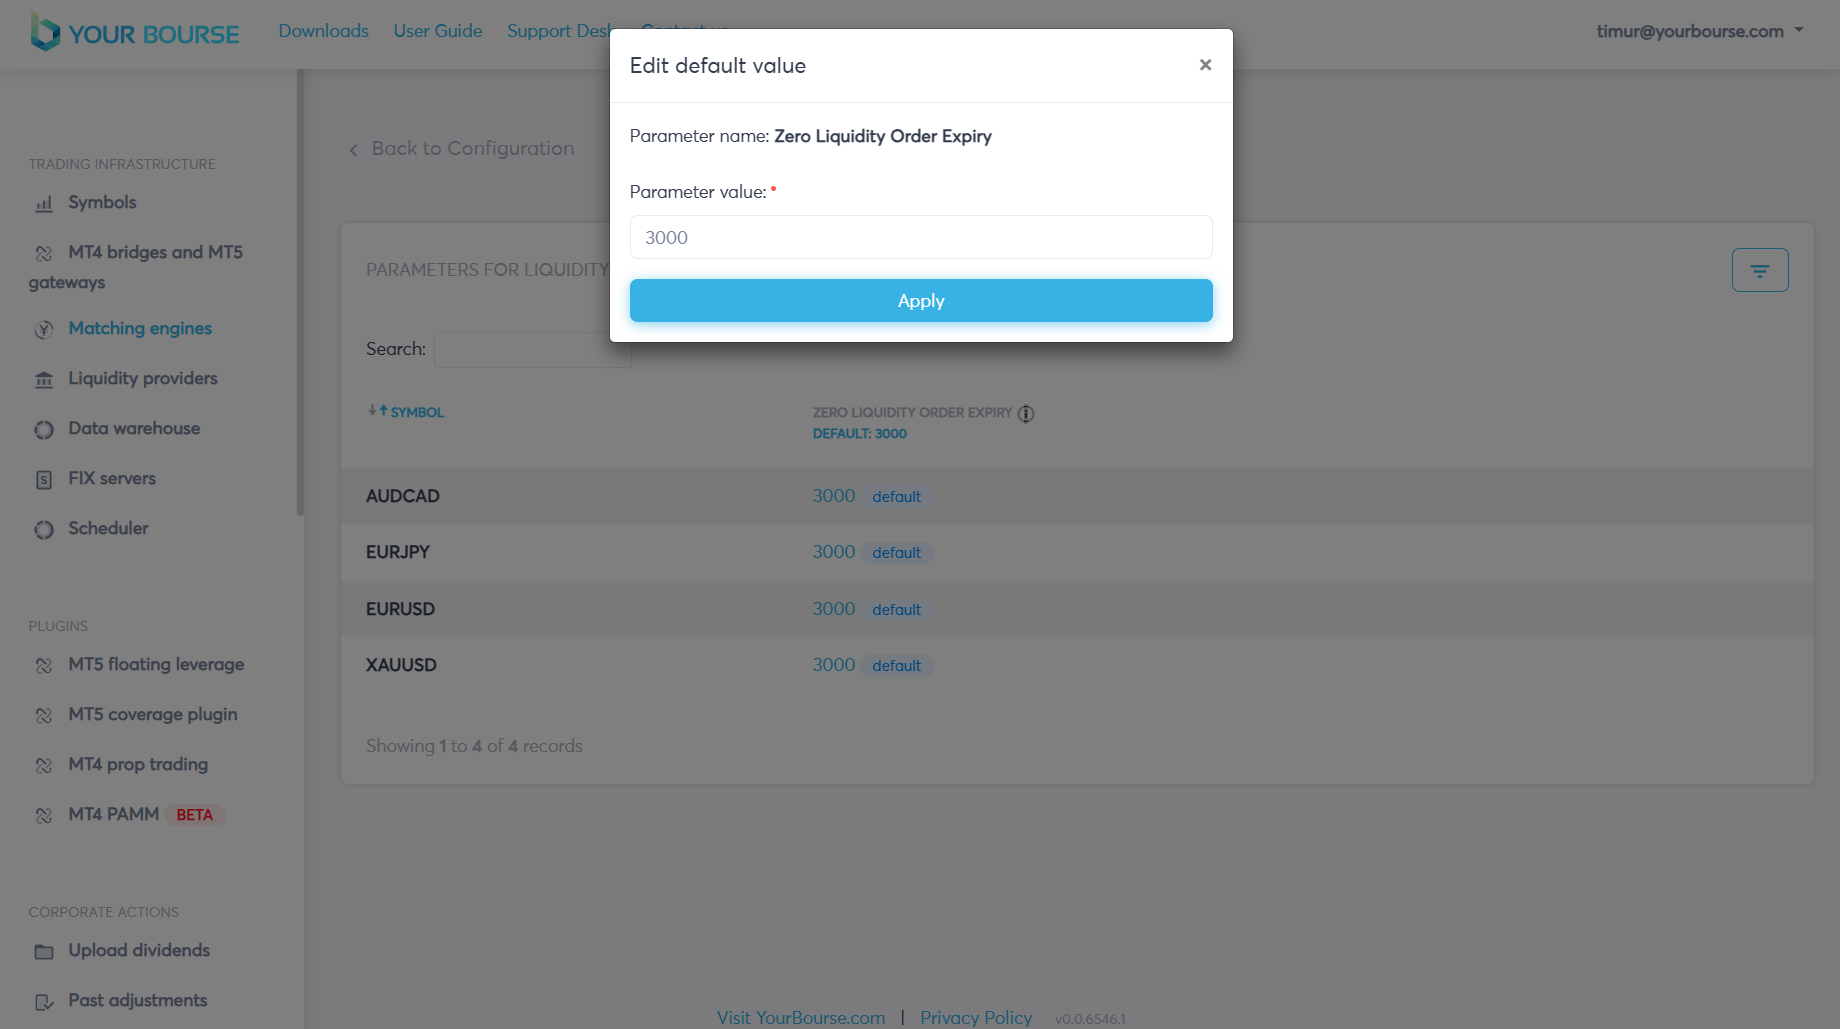
To customize this parameter for all symbols select the “DEFAULT: 3000” button. This is the default number in milliseconds that is applied to all symbols unless specified.
The parameter value can be changed by inputting a new number and selecting the “Apply” button.
To change the parameter value for a specific symbol select the value corresponding to the symbol in the “Zero Liquidity Order Expiry” column.
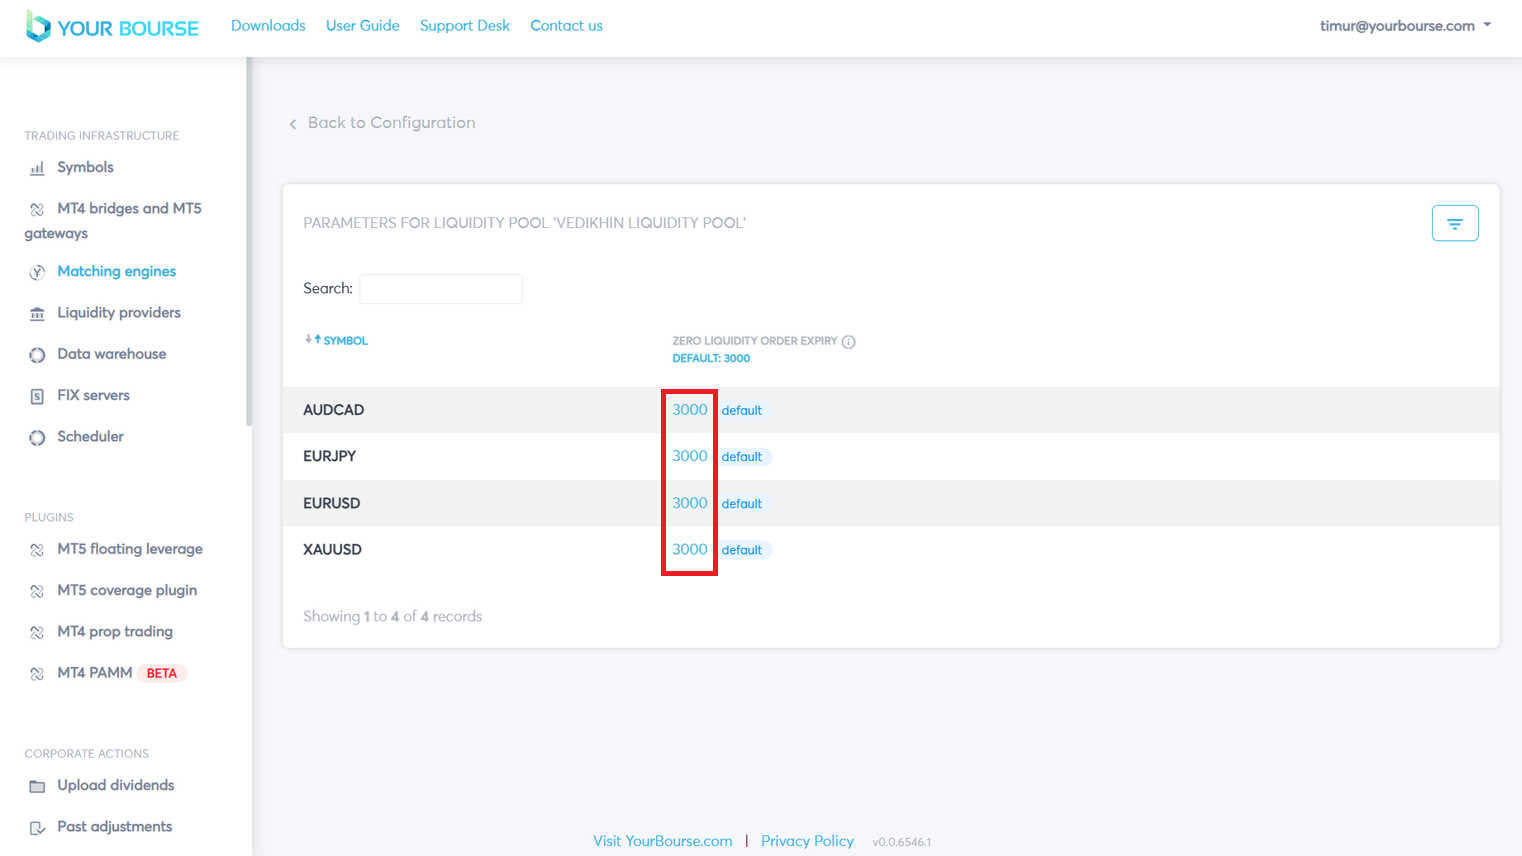
A new parameter value can be entered and then finalized by selecting the “Apply” button.
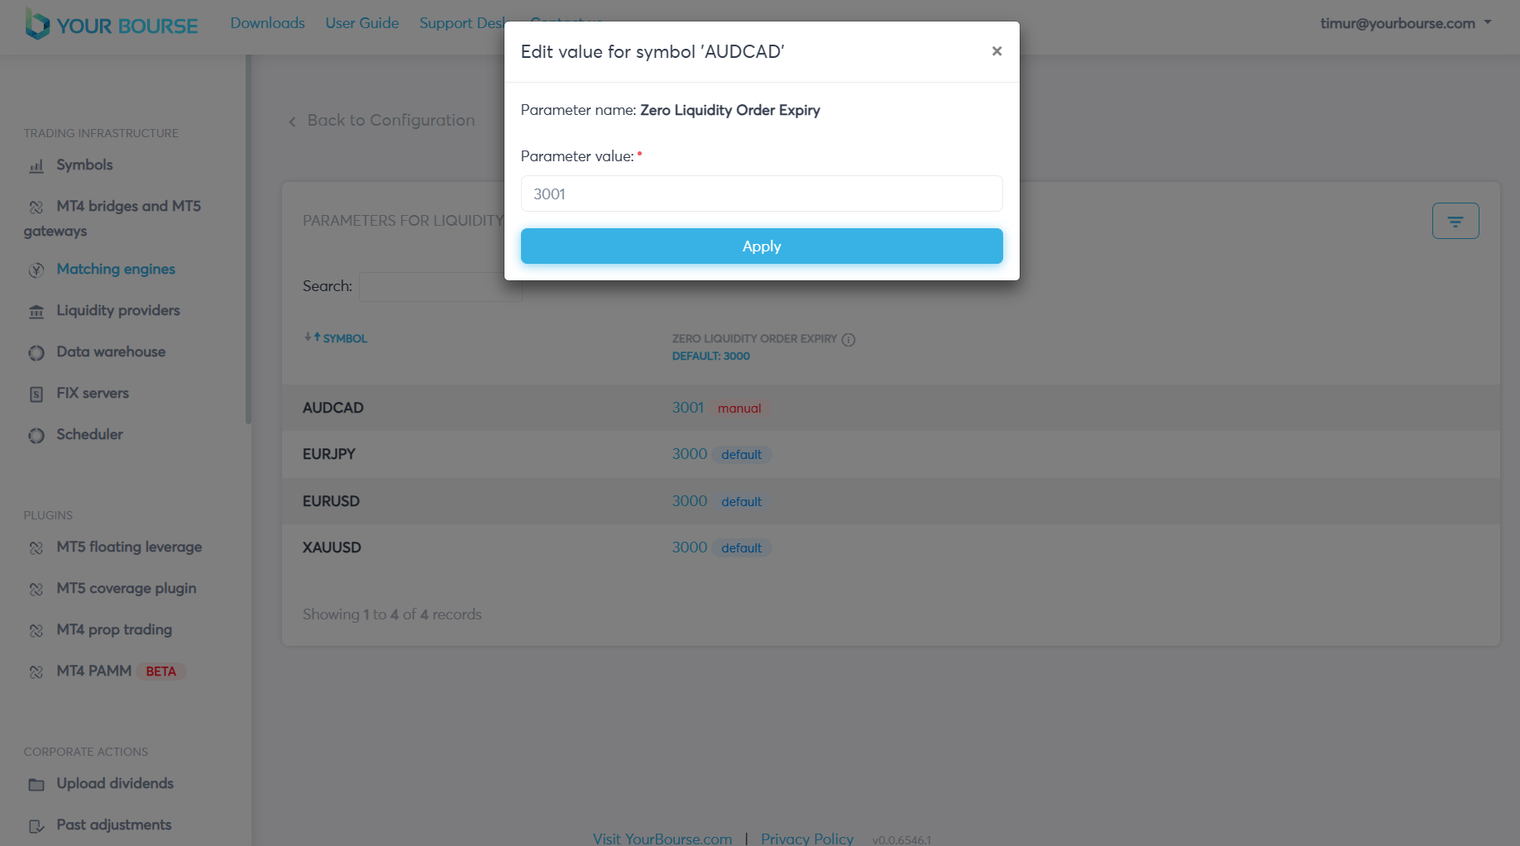
The table should now contain a red “manual” icon next to the chosen symbol.
Importing and Exporting Liquidity Pool Data
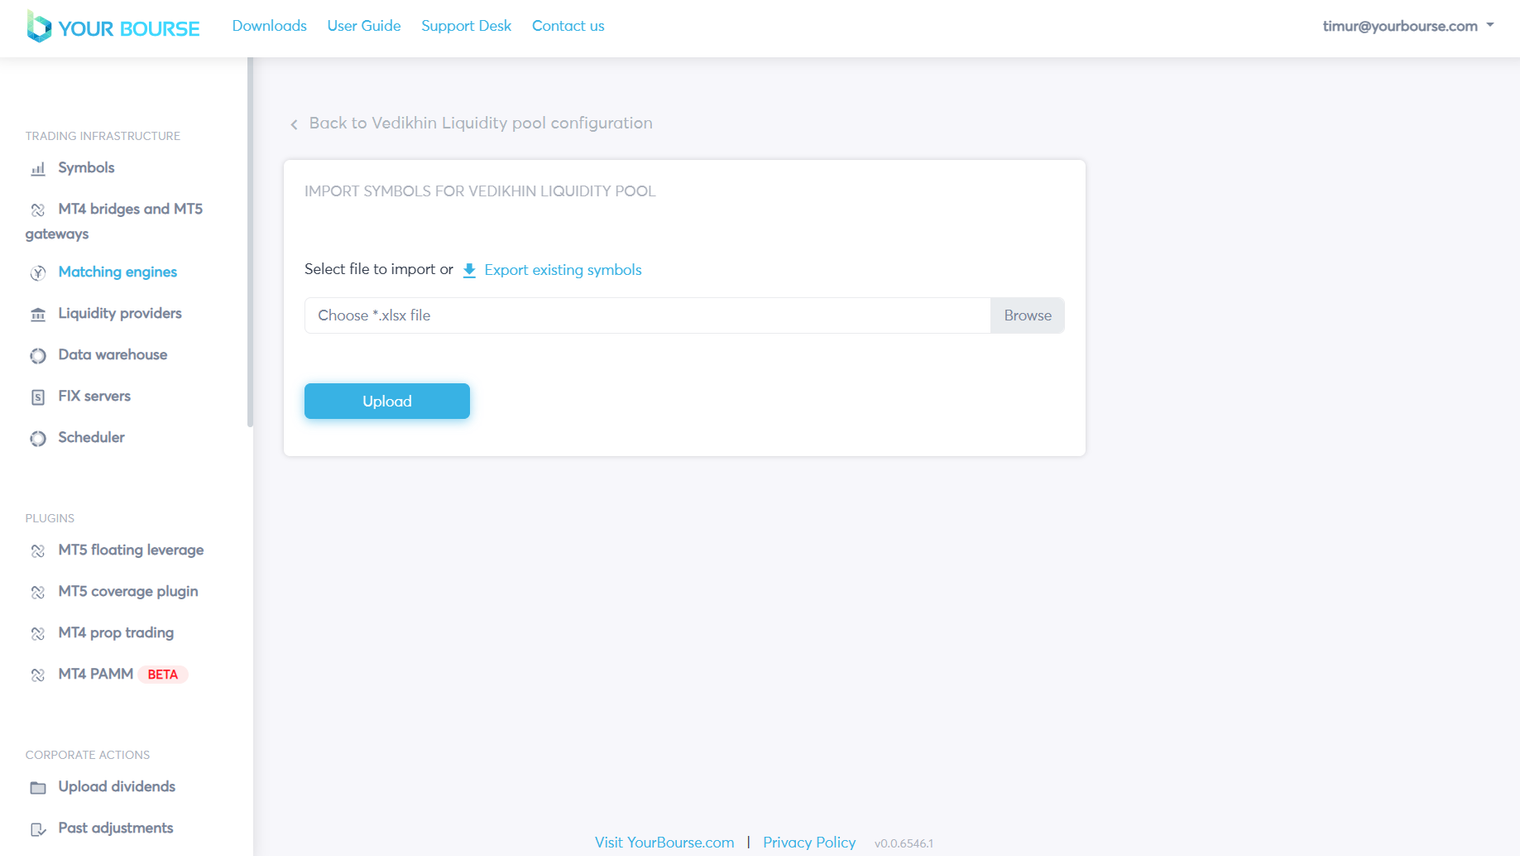
The YourBourse platform allows the user to import or export symbol data.
To import liquidity data the user must select the “Import” button.
A new page is opened were data in the form of an .xlsx file can be imported.
To export liquidity pool data the “Export” button must be selected. This will result in an excel file being downloaded on the users machine.