FIX client setup
To get access to your FIX server, please contact Your Bourse. After your FIX server is created and added to your Price Plan, you can find it in the FIX servers section in your Cloud Portal.
If you'd like to open margin accounts for your FIX client, you need to connect your MT4 or MT5 server to your FIX server.
To do so, you need to install the ExternalOrderListener plugin on your MT5 server. For MT4, no extra plugins are needed, however, you will need to add extra parameters to the MT4 bridge configuration. The parameters for the ExternalOrderListener plugin or MT4 bridge will be provided by Your Bourse.
Please contact Your Bourse Support and request SenderID and ExternalOrderSender.
Adding a FIX client
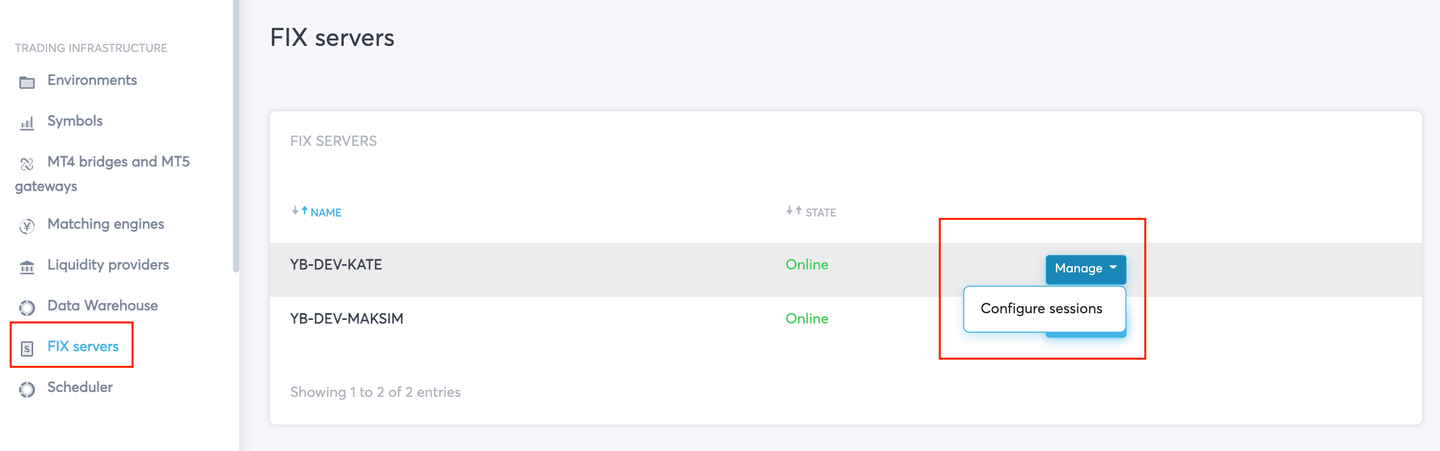
1. On the Trading Infrastructure section, click on FIX servers.
2. Go to Manage → Configure sessions for your FIX server.
3. Click Add FIX session in the top-right corner.
4. Create parameters for the newly created FIX sessions.
-
Quote session sender comp id, Trade session sender comp id are the Parameters for the client’s Quote and Trade sessions correspondingly. These values will be used by the client in the SenderCompID tag.
-
Account id is the Margin account that will be used for margin checks on the respective MT4 or MT5 server. Margin accounts for FIX clients must be set to “Netting” mode.
On the page one needs to specify the email address(es) where the password for the FIX session will be sent. The password will be generated automatically.
If the email address is not specified on the page of creating FIX session, it's possible to create it by clicking "Manage" - "Reset Password" on the main page with the list of created FIX sessions.
5. Click Save. Your client’s FIX credentials have now been created.
Enable Pricing for a FIX client.
For your FIX client to be able to start receiving their price feed, you need to set up a trading source for their FIX session.
1. On the FIX Sessions page, click the Manage button next to the client’s FIX session and select Configure Symbols.

2. Select symbols for your FIX client from the list of symbols present in your Matching Engine. Enable symbols for the FIX session by ticking Enable checkbox next to each symbol.
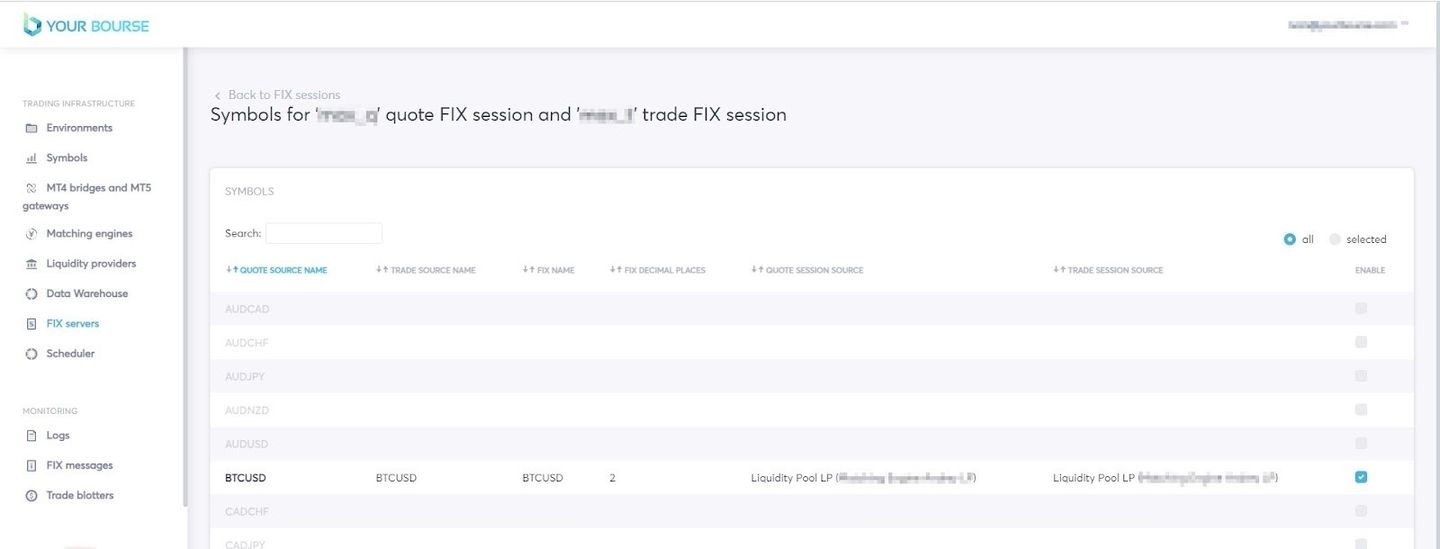
While enabling a symbol in a popup window, you will have to configure the following:
-
FIX name - the name of the symbol to be passed via FIX
-
FIX decimal places - decimal places for FIX symbols
-
Quote session source - the Liquidity Pool that will be streaming prices for this FIX client.
-
Trade session source - the routing for the FIX client’s trades:
-
if you select your Liquidity Pool / Matching Engine as the Trade session source, then the FIX server will not perform margin checks on the client’s orders and will send them straight to your Matching Engine for execution.
-
if you select your MT4 or MT5 server name - all orders will be routed through margin checks on MT4 or MT5 server. For this option, you will also have to add the Trade source symbol name, which is the symbol name enabled for this client’s account group on the MT4 or MT5 server.
-

Configure A/B-book settings for a FIX client
In FIX servers section, go to Manage → Configure sessions for the selected FIX server.
Find the FIX client, click Manage → Configure parameters.
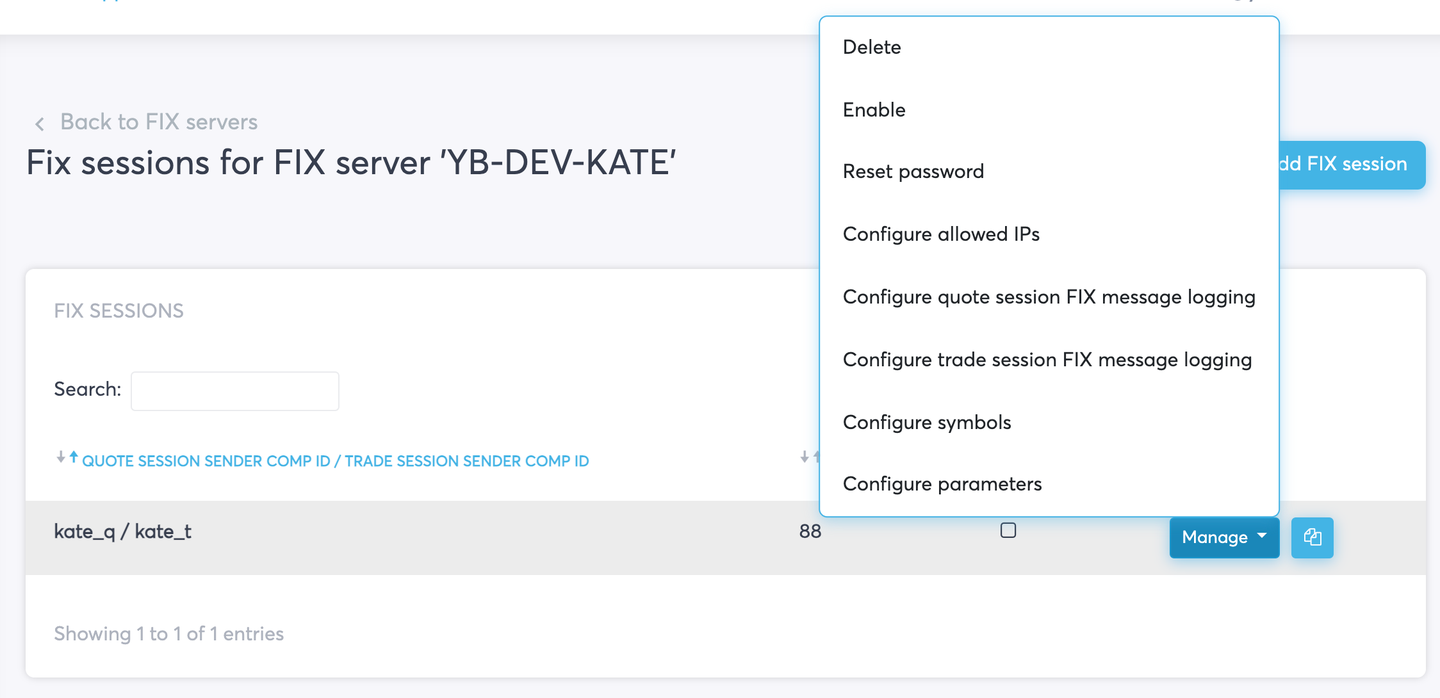
Set up Ask markup and Bid markup (in points), A-Book volume increment and hedging multipliers for this FIX client.

You can now send the FIX credentials to the client by copying them from the FIX sessions page:
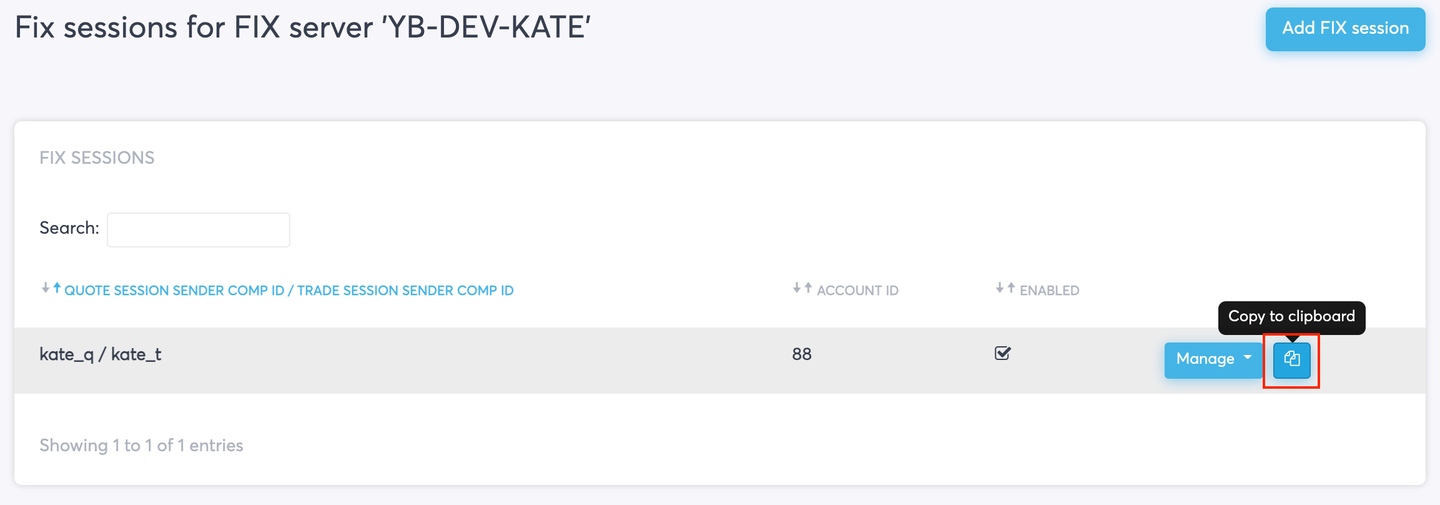
Please do not edit the FIX credentials between copying them from the clipboard and sending them to the client. This will affect client’s connectivity to your FIX server.